5 key features in Blender 4.0
Main image: Blender 4.0’s splash screen art, created by Gaku Tada.
The Blender Foundation has released Blender 4.0: a major update to the open-source 3D app – and, as the first of a new two-year cycle of Blender releases, a compatibility-breaking one.
Key changes include the option to create your own custom tools with Geometry Nodes, rewrites of the Principled BSDF and Principled Hair BSDF shaders, light and shadow linking in the Cycles renderer, and support for Hydra render delegates.
Below, we’ve picked out five of the most significant changes – including hidden gems like greenscreen keying in the Viewport Compositor – and summarized the updates to the interface and to the other core toolsets, including 3D modeling, texturing, animation and video editing.
1. Create your own custom tools with Geometry Nodes
One of the most talked-about features in Blender 4.0, the new Node Tools feature lets artists use Geometry Nodes to create their own custom tools without having to write Python code.
Custom tools can be accessed from menus, in the same way as Blender’s standard tools.
The ultimate aim of the Node Tools project is to make it possible to recreate any standard Edit Mode operator with nodes, but it’s still a work in progress.
There are posts about how Node Tools work on the Blender Developer blog, and we did a story of our own when they were added to the beta release, so check that out for more details.
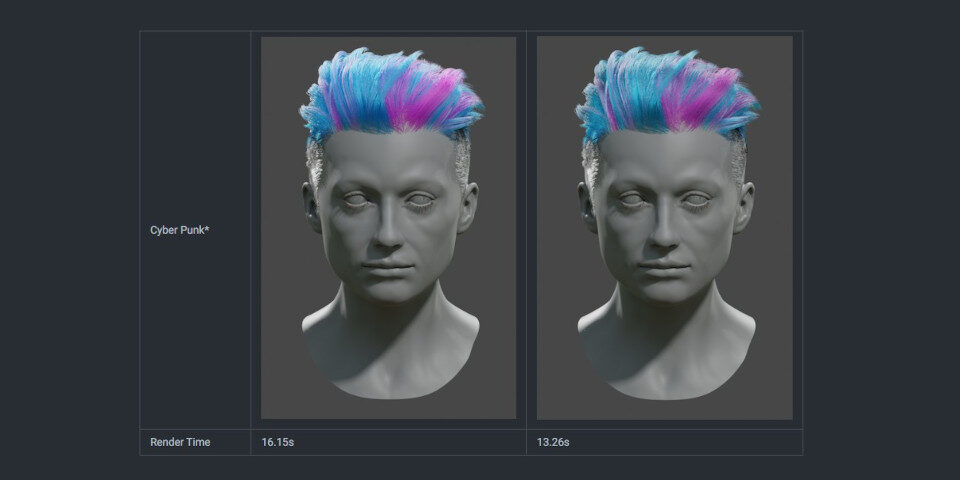
Blender 4.0 overhauls both the Principled BSDF and Principled Hair BSDF shaders. The image above shows the hair shader’s new Huang model (right) and existing Chiang model (left).
2. Better principled shading recreates real-world materials more accurately
Like many 3D applications, Blender includes shaders based on the principled approach developed at Walt Disney Animation Studios in the 2010s.
It’s designed to make it easy for artists to recreate a wide range of real-world materials, providing a small set of intuitive parameters rather than aiming for strict physical accuracy.
Blender 4.0 revamps the main Principled BSDF shader, reordering the material layers so that the Coat layer – used to mimic surface coatings like varnish – sits above the emissive layer.
The change should make it easier to recreate objects like phone or monitor screens, where a light-emitting surface is covered by a surface coating.
The Sheen layer – traditionally used for cloth – sits on top of the Coat layer, and uses a new microfiber shading model, making it possible to use it to recreate surface dust.
You can see a diagram of the new material layers in the online manual, and more details on the other changes to the Principled BSDF node in the release notes.
The Principled Hair BSDF shader has also been updated: its new shading model, named the Huang model after the its developer, Weizhen Huang, is based on this 2022 research paper.
Unlike the existing model – still available, and now renamed the Chiang model – it supports elliptical cross-sections for hairs, recreating human hair more accurately.
Both have their own merits: the new Huang model should generate nicer reflections when hair is viewed against the light, although hair may look flat when viewed up close; and render times are higher when using lower roughness values.
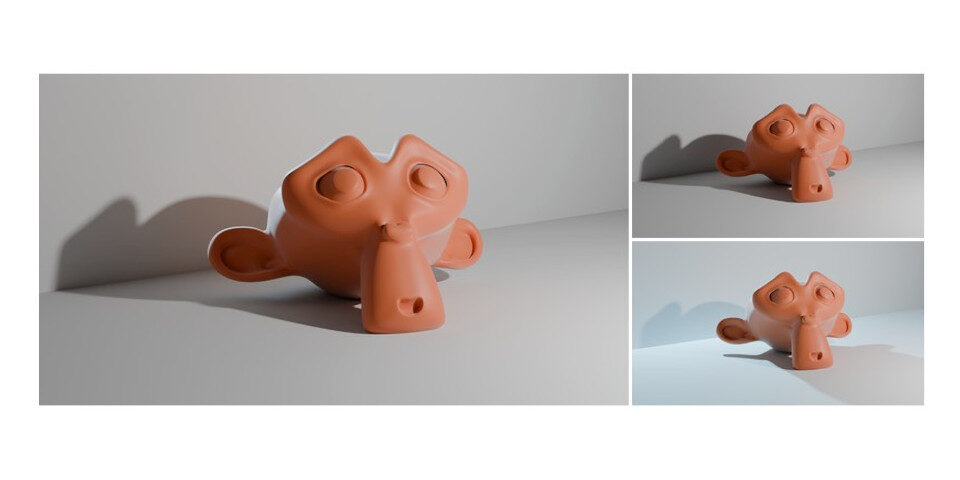
Light linking in Cycles makes it possible to add rim lighting to a render of the monkey object (main image), without having the rim light affect the shadow on the wall behind (below right).
3. Get more control over scene lighting with light linking in Cycles
Cycles, Blender’s main production render engine, gets a long-awaited new feature, light linking.
The change makes it possible to set light sources (both conventional lights and emissive materials) to affect only specific objects in a scene, providing more artistic control over lighting.
The implementation also supports shadow linking, making it possibe to control which objects in a scene act as shadow blockers for a light source.

Pixar’s RenderMan for Blender add-on. Support for Hydra delegates in Blender 4.0 should make it easier for other third-party developers to integrate their renderers with Blender.
4. Supprt for Hydra delegates streamlines renderer development
Another important change to rendering, albeit one that will initially affect developers more than artists, is native support for Hydra render delegates.
The Hydra architecture is part of Universal Scene Description (OpenUSD), so Hydra delegates work across the growing number of 3D applications that support it.
That should reduce the work needed for third-party developers to create Blender versions of their renderers: one obvious candidate would be Arnold, which doesn’t have an official Blender plugin, but which is already available as a Hydra delegate for Maya and Houdini.
Blender material nodes can now automatically be converted to MaterialX nodes, the open material standard supported in OpenUSD, although not all nodes are currently supported.
The default Hydra delegate, HdStorm, is also now available as an official add-on, making it available as an alternative to Blender’s native renderers for studios with OpenUSD-based pipelines that need to preview how assets exported from Blender will look in other applications.
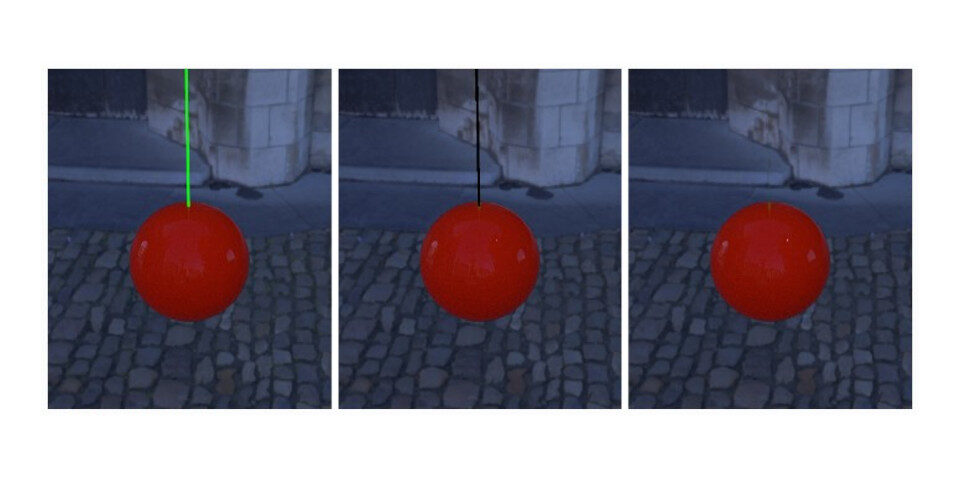
New Viewport Compositor nodes speed up rig removals in VFX shots. Above, chroma keying removes the green-painted wire, then Inpaint fills in the hole left in the background plate.
5. Support for greenscreen removal in the Viewport Compositor
Another change in Blender 4.0 that isn’t being promoted heavily on the official ‘What’s new’ page, but we think will be useful to some artists, is the latest update to the Viewport Compositor.
It adds six new nodes, including Keying, a “one-stop shop” for green screen removal, and Inpaint, for extending the borders of an image into transparent or masked regions.
Together, they provide a quick workflow for removing wires and practical rigs from VFX shots, with Keying removing the wire itself, then Inpaint filling the hole left in the background plate.
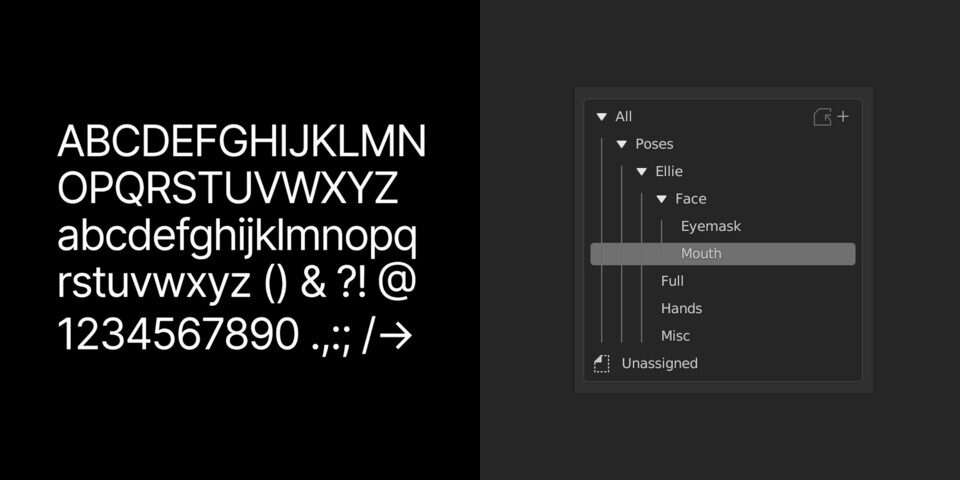
Blender 4.0 features a number of changes to the user inteface, including a new font, Inter, shown as a typographic sample, and in use within one of the redesigned tree-view UI elements.
Bonus ‘feature’: updates to the Blender interface and keymaps
And while it isn’t strictly a new feature, one of the most obvious changes in Blender 4.0 is Inter.
The new font used in Blender’s user interface is specifically designed to be read on computer screens – it’s one of the Google Fonts – and should look sharp even on very small text.
Inter is one of a number of changes to the UI in Blender 4.0, including better designs for tree views and the Color Picker, and better previews in the File Browser.
The update also makes it much easier to search the interface: the Add menus can be searched instantly by typing, and you can hit [Space] to search in any other menu or submenu.
Blender’s keymaps – including the industry compatible keymap used to switch keyboard shortcuts to ones more familiar to users of other 3D apps – have also been updated, partly to future-proof them for new features in the sculpting, painting and Grease Pencil toolsets.
Improvements to snapping workflow in Blender 4.0 help to speed up hard surface modeling. The update also features improvements to most of the software’s other core toolsets.
Other changes: a quick summary of what else is new in the core toolsets
Blender 4.0 also features updates to most of the software’s other core toolsets.
For 3D modeling, Blender 4.0 overhauls the snapping system used to snap to other objects in a scene when transforming geometry
Geometry Nodes get support for ‘repeat zones‘ for looping part of the node graph, plus eight new rotation nodes.
For texturing, there are new options in the Noise Texture and Voronoi Texture nodes.
The rigging and animation toolset gets a new system of bone collections that replaces bone groups and layers, removing the old 32-layer limit, while the Graph Editor gets new slider operations for adjusting animation curves, and a Butterworth smoothing filter for mocap data.
For Mac users, there are important changes to rendering: the old OpenGL backend has been removed, making Metal the only one supported, and in Cycles, MetalRT GPU-accelerated ray tracing is now enabled by default when rendering on Apple’s new M3 processors.
In the color management toolset, a new AgX view transform provides better handling of over-exposed parts of a render than the existing Filmic transform, which it replaces as the default in new files, and there are new options for HDR displays on macOS.
For video editing, the Sequencer gets a new workflow for retiming strips interactively.
Pipeline integration and backwards compatibility
For visual effects artists, Blender 4.0 is back to full compliance with the VFX Reference Platform, after the Blender Foundation reversed its decision to stop following the spec last year.
In OpenUSD pipelines, animation data – both skeleton and blendshape animations – can be imported via UsdSkel; and there are updates to 3DS, FBX, OBJ and PLY import and export.
And as the first release in a new update cycle, Blender 4.0 is a compatibility-breaking release, with breaking changes to rigs and animations and the Python API.
.blend files saved from Blender 4.0 are incompatible with Blender 3.5 and older, although they can be converted by opening them in Blender 3.6, then re-exporting them.
System requirements
Blender 4.0 is available for Windows 8.1+, macOS 10.15+ (macOS 11.0 on Apple Silicon Macs) and glibc 2.28+ Linux. It’s a free download.
See the Blender Foundation’s overview of the new features in Blender 4.0
Read the Blender 4.0 release notes
Have your say on this story by following CG Channel on Facebook, Instagram and X (formerly Twitter). As well as being able to comment on stories, followers of our social media accounts can see videos we don’t post on the site itself, including making-ofs for the latest VFX movies, animations, games cinematics and motion graphics projects.