10 tips for using Maya’s XGen in production
Procedural instancing enables artists to generate, animate and render vast amounts of geometry more efficiently. It is well suited to creating visually complex assets such as fur, hair or feathers, as well as large-scale environments like forests, grassy fields and rocky landscapes. As computational power increases, instancing is becoming an increasingly integral part of the surfacing and shading process in modern CG pipelines.
Developed at Walt Disney Animation Studios, and integrated into Maya 2016, XGen is a powerful instancing framework. It lets you distribute arbitrary geometry over a surface by means of maps, expressions and guides. It is essentially an interface to a complex render procedural and can be, in a way, considered a full shading tool.
The following tips are designed to make your workflow more flexible when using XGen in production, enabling you to accommodate the changes that feature work requires. Although they are all tailored to Maya, they can be considered general guidelines when producing new work using any instancing framework. This isn’t a beginner’s guide, so we’ll be assuming that you already have some familiarity with basic XGen workflows.
The base model in the images below is 0a Blonde Girl, a free asset available via TurboSquid.
Decide early whether you want to use guides to control instanced geometry, or adopt a fully procedural workflow. The sooner you lock this decision, the better able you will be to deal with changes.
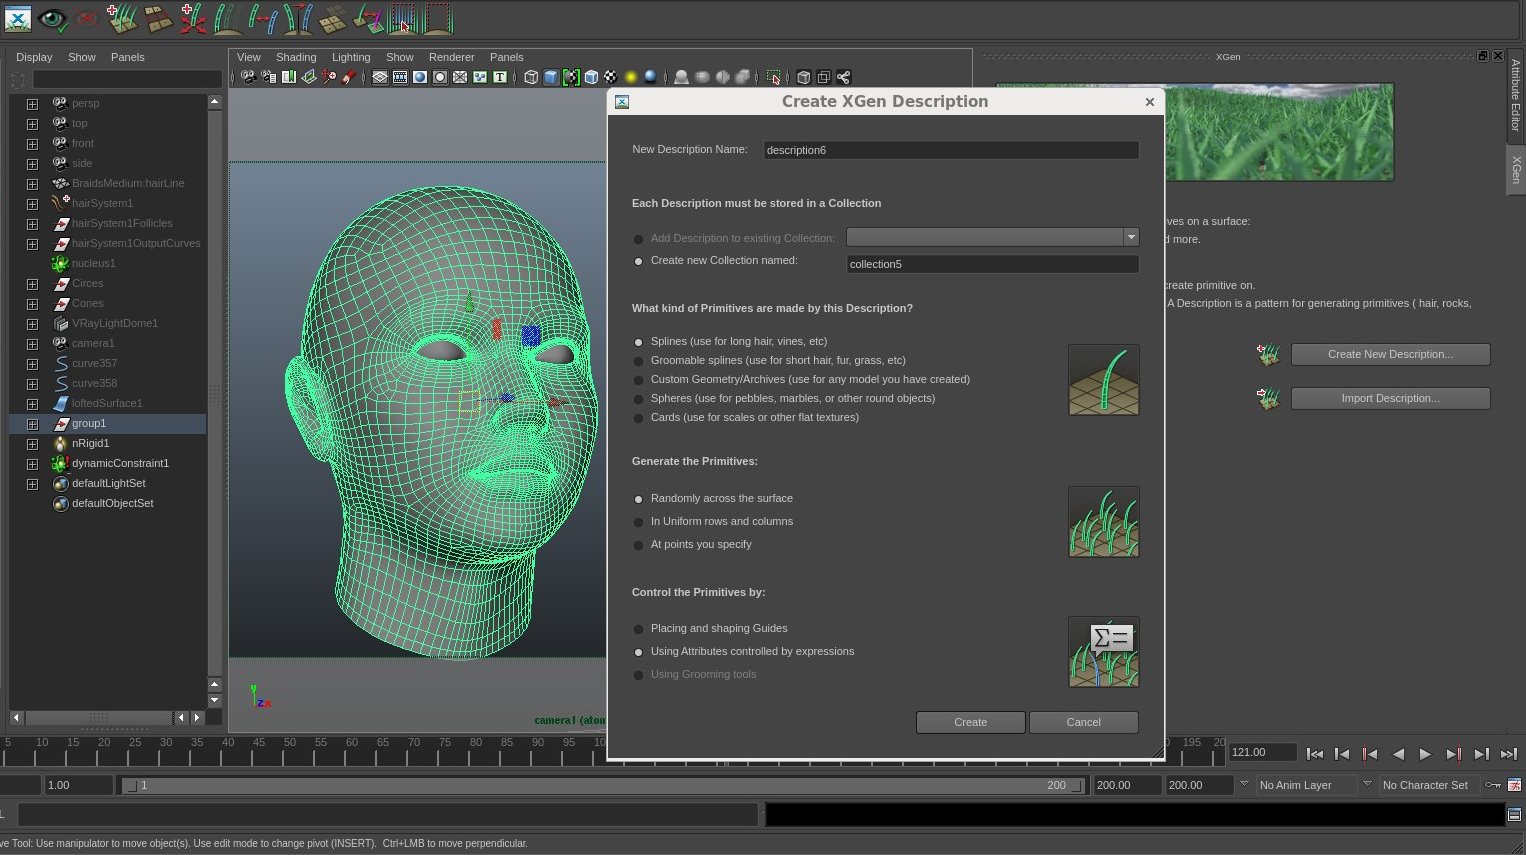
1. Plan your asset first
Thinking about how are you going to structure your workflow is paramount to getting work done on time. When you create a new Description, XGen launches a wizard to guide you through the key decisions. Although you can switch later, the type of assets you are going to produce will determine the type of workflow you use.
In general, I like to use a full procedural workflow for instancing short, densely packed objects, like fur and scales, or environments. For long hair, it is best practice to start off with guides to describe each hair clump, which provides more control over root-to-tip variations.
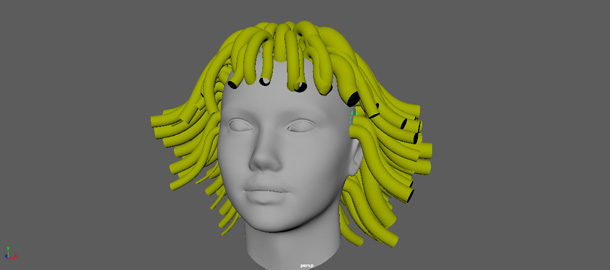
Mock up your asset using low-res geometry before you begin working with XGen. When creating long hair, simple tubes will give you a good idea of how the hairstyle will look before you create the instanced curves.
2. Block out your look
Before creating any XGen nodes, mock up your asset using simple, low-resolution geometry. You’re basically sketching the layout that you are going to fill with instances or primitives. This will help you structure your work.
Let’s consider the common example of clumpy or curly hair. It is important that you block the look with simple geometries such as tubes. (XGen actually offers a groom-from-tubes workflow.) These are easy to model and will give a very good idea of what the hair style will look like once it is translated into actual instanced curves.
Mock-ups are often used for the first round of feedback, enabling you to receive notes before you have created a single instance. Establishing a good representation of the volumes of an asset early on will also help later on when running cloth simulations, and to ensure a clean, manageable result.
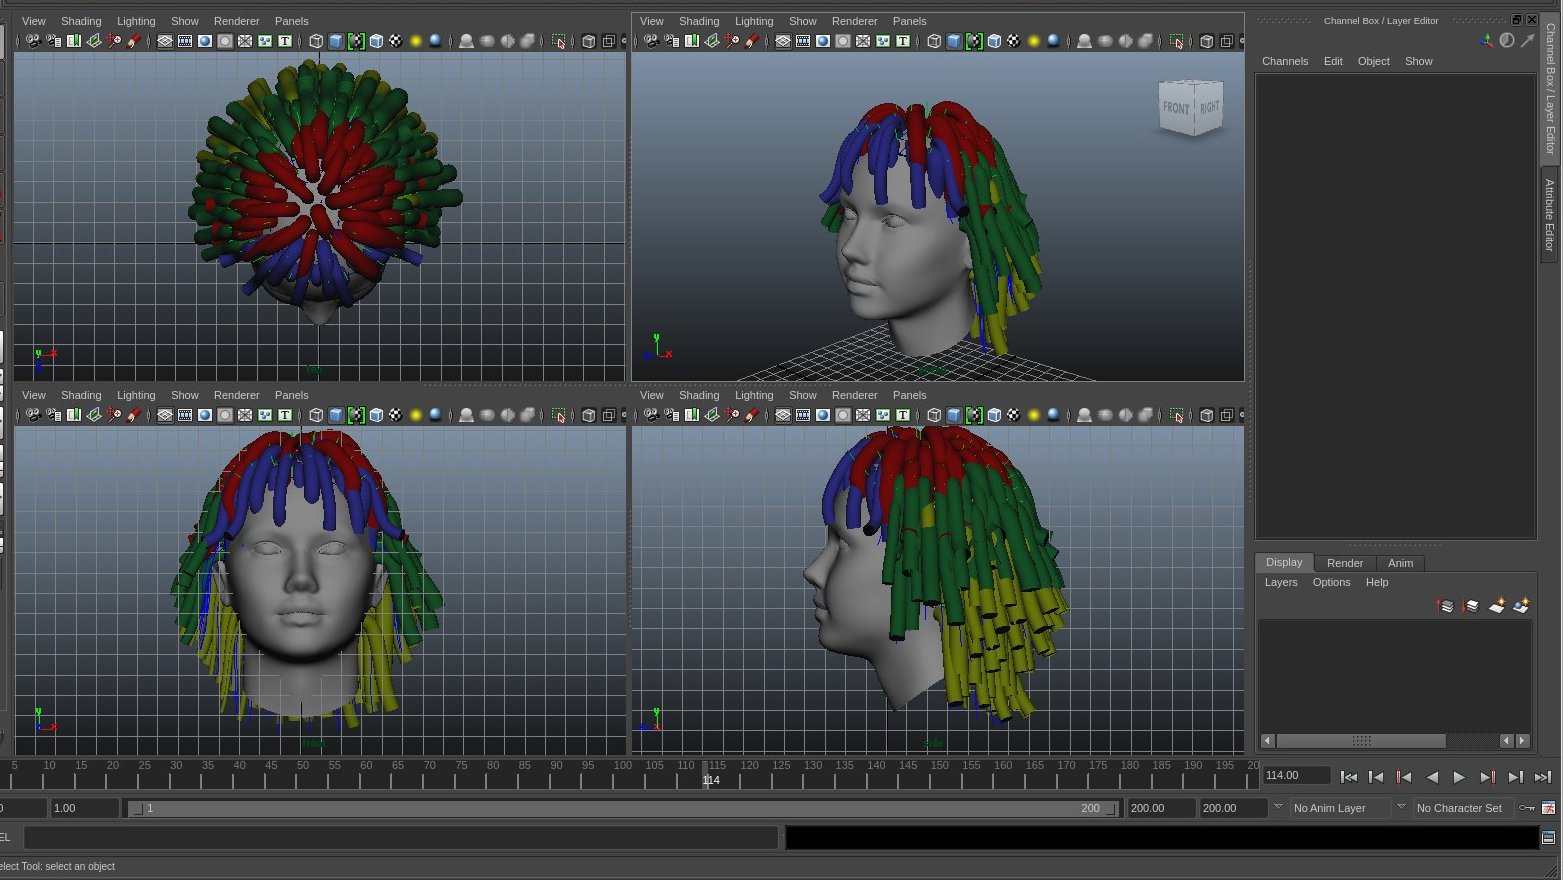
Dividing your blocking geometry into layers forces you to focus on the individual characteristics of each one. You will replicate the workflow in XGen later, grouping sets of instancing Descriptions in to Collections.
3. Organise the blocking model in layers
Once you have figured out the overall look of your asset, split the blocking geometry up into layers. XGen uses the same workflow, enabling – or even forcing – you to group sets of instancing Descriptions into Collections.
Working in sections forces you focus on each one individually, and enables you to progress on different fronts in parallel. In addition, not having a monolithic look can be a life-saver, especially in big productions, since it avoids having to start again from scratch to accommodate unexpected changes.
Although guides can be a powerful option for small, static set-ups, using maps to control instances keeps your asset fully procedural, making it easier to accommodate changes later in production.
4. Keep everything you can procedural
XGen provides you with two substantially different ways to control instances: guides and maps/expressions.
Guides are placeholders that define the shape of an instance at a particular point on a surface. The shapes of the other instances are generated by interpolating between the guides. In a static set-up, this is a powerful, flexible approach, since you can add or reshape guides at will. However, if not used carefully, guides can get out of control, making it difficult to manage the asset later.
I personally prefer to use maps or expressions to control instances, since they keep the asset fully procedural – and therefore flexible. When working in this way, refine the look iteratively: begin with broad strokes defining the basic look, then use layers and masks to add details progressively.
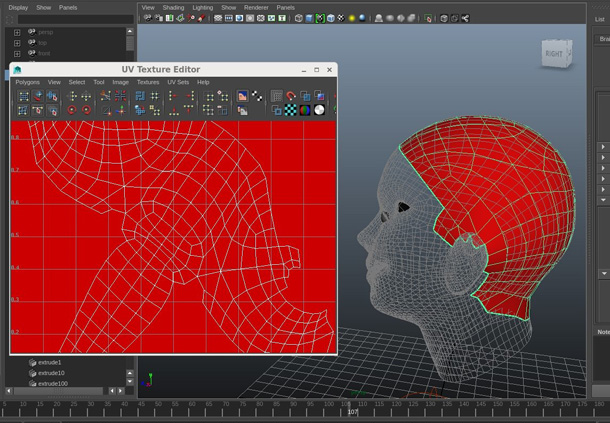
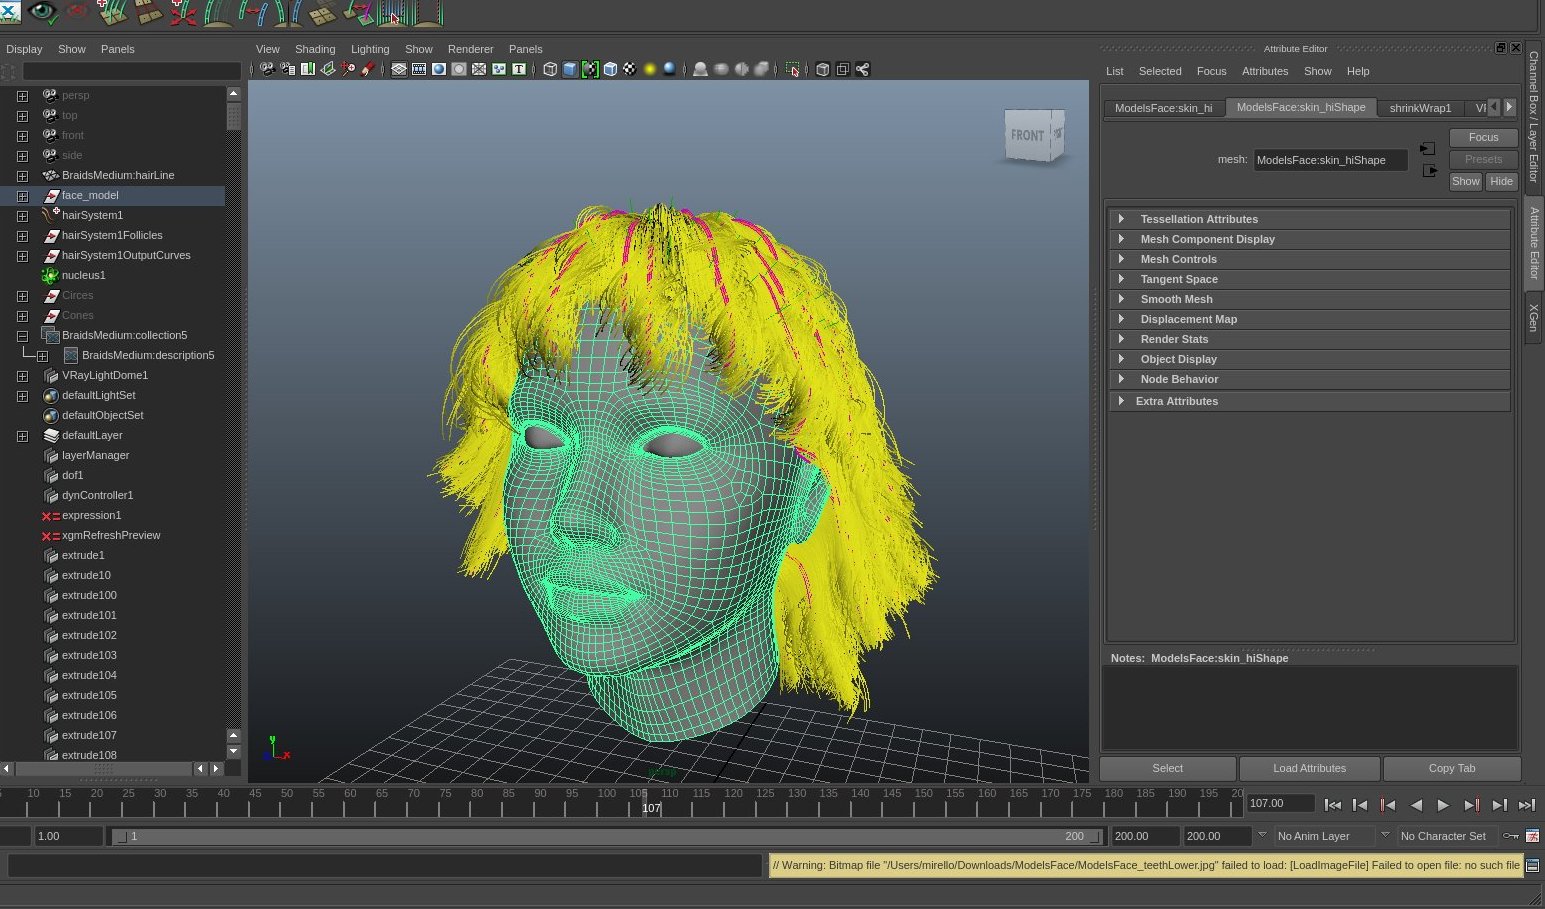
A generic scalp geometry shrink-wrapped to a head model. Placing your instances on the scalp geometry rather than the head itself protects your XGen set-up from changes to the topology of the base model.
5. Use scalp geometries
One of the major weakness of XGen is that is topology-dependent, meaning that if the base mesh changes, you need to transfer your groom – the Collection of Descriptions – to the new geometry. Depending on the complexity of your set-up, this can be time-consuming, or even impossible.
But in a production environment, where you are working in conjunction with other departments, things change often – and often drastically. An update to a model may change the vertex order of the mesh, for example.
A good way to get around this is to use scalp geometries, which you own and manage. These are usually non-renderable, low-resolution models that wrap around the renderable mesh and deform along with it. Placing your instances on this in-between surface rather than the renderable mesh helps you avoid surprises.

A Maya force field driving XGen splines via nHair. In shots where it is not possible to use XGen’s own dynamic solver, structure your rig in such a way that animation and dynamics are kept separate.
6. Separate dynamics and animation
If you are working on an asset that will be animated, defining the static look of the asset is only half the battle. It is important to think about how your groom will behave when animated. There are two types of motion involved here: animation and simulation. The former is the motion of the base mesh; the latter is the reaction of the instances to the animated mesh – and, eventually, to external forces.
First, let’s think about animation. The basic task is to get the instances following the underlying mesh gracefully – and more importantly, without popping. When meshes deform, they change the spatial relationship of instances between frames, which can create artefacts. XGen provides different techniques to avoid popping – Autodesk recommends using Patch References (PRefs) – which you will need to employ to create a successful sequence of rendered images.
Once you have the base mesh animated and the instances following it without artefacts, it’s time for simulation. XGen has its own dynamic solver, which is great for basic simulations. It’s simple, and often, it’s just enough to get your shot through. But when working on hero assets, you may need a more sophisticated solver, or even to pass the asset over to another department that handles that part of the work.
In such cases, you want to keep animation and simulation separate, then ‘plug in’ the result of the simulation later. These results usually come in the form of geometry caches, so your rig needs to be able to make use of them: for example, through Wire Deformers, or by ingesting animated guides that drive the hair clumps.
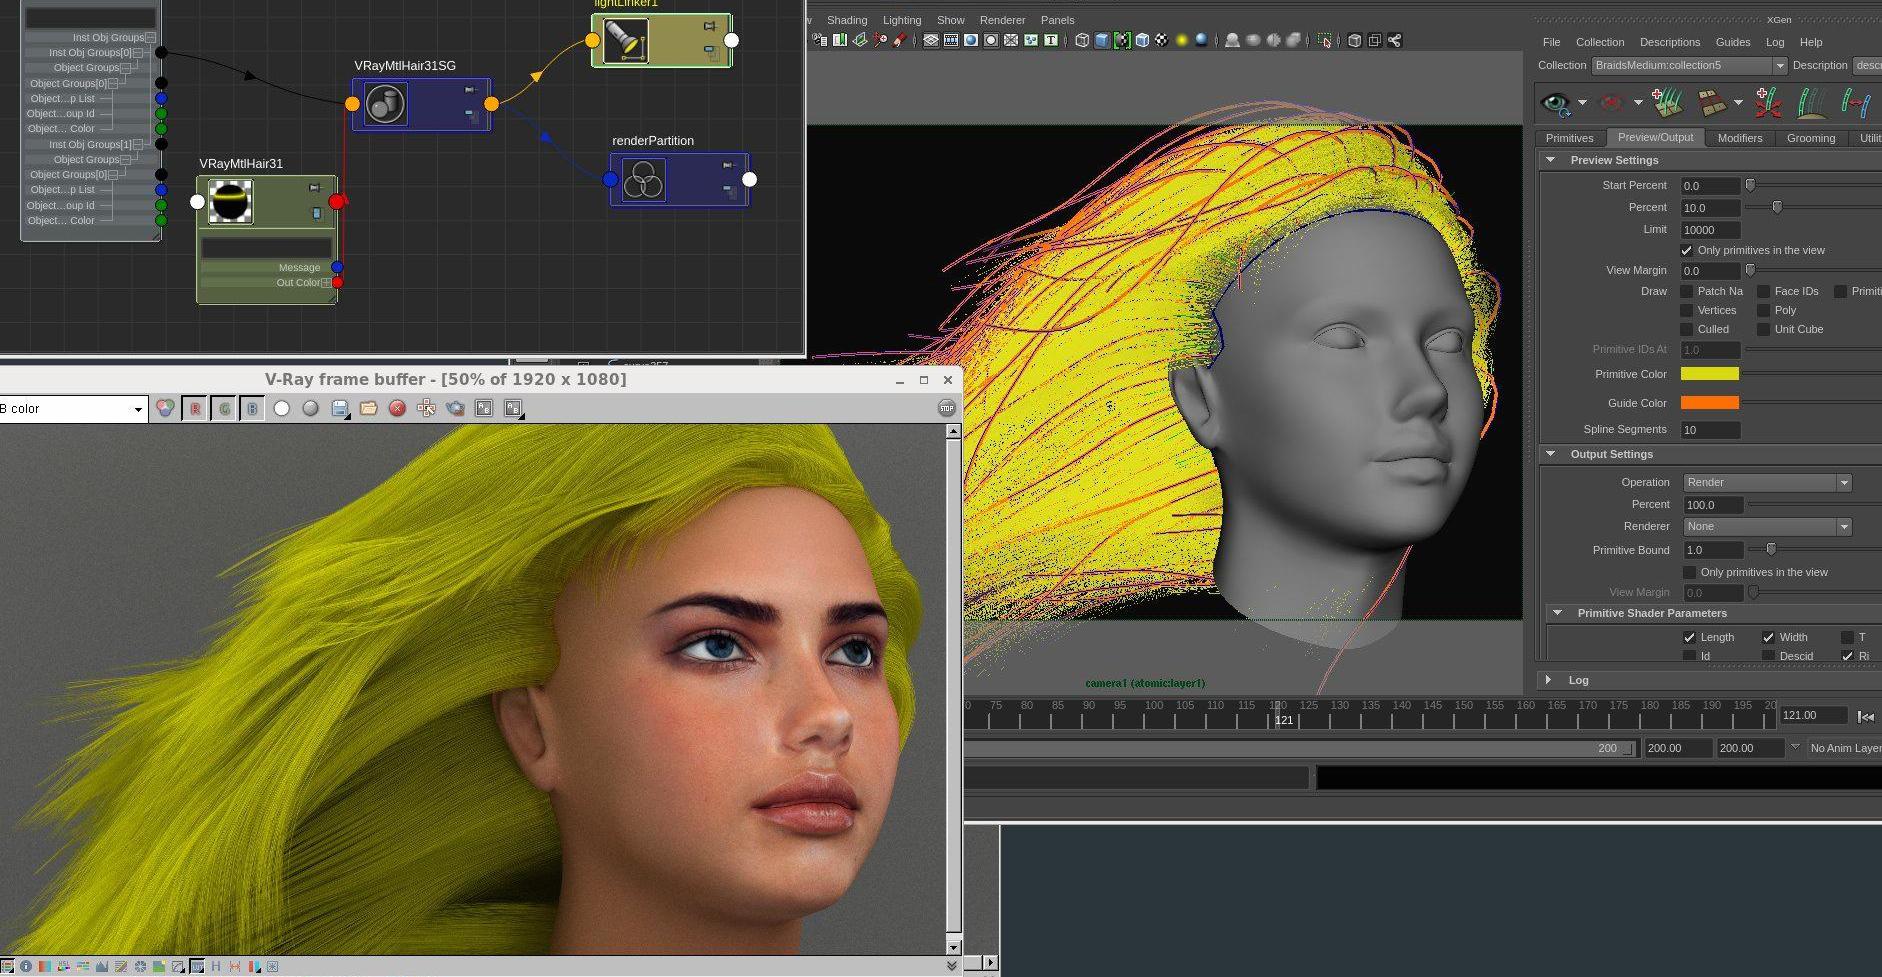
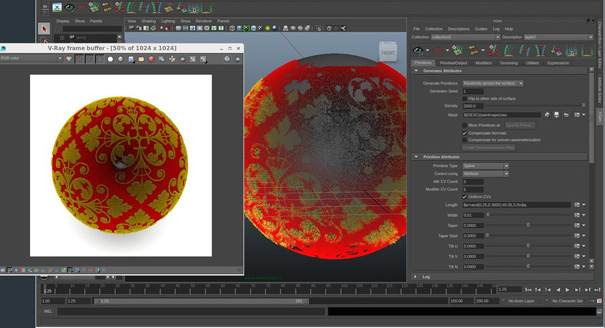
A basic render of an XGen set-up in V-Ray. XGen ships with readymade mental ray and RenderMan material and shading nodes, but you can use its utility nodes to render your set-up with other renderers.
7. Use utility nodes to plug in other renderers
XGen is tightly integrated with mental ray and RenderMan, and ships with its own shading and material nodes for these renderers. These provide a comprehensive set of templates for common scenarios, enabling you to establish the look and feel of a set-up quickly.
But as with dynamics, the chances are that in a production environment, look development, lighting and rendering will each be handled by a different team member – and possibly, using different renderers.
In such cases, you can make use of XGen’s utility nodes to map the UV surface in order to apply any material or ramp, or even an entire shading network, to your groom. This enables you to achieve a more complex look. There are a lot of nodes that you can use, but the one that will be most useful here is xgen_ptex_lookup.
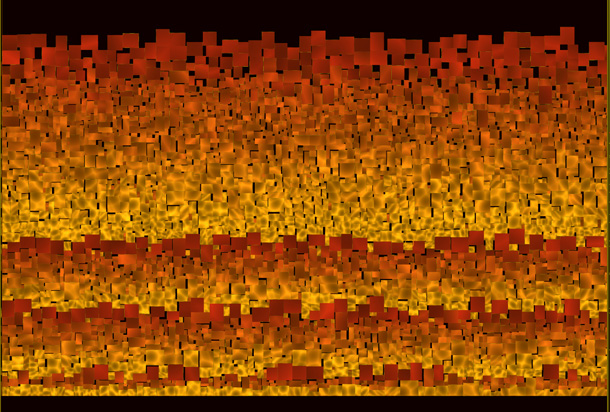
A typical Ptex texture file of the type used by XGen. Ptex files are distortion-free, but not human-readable, so archive your maps in other formats as well, particularly if you will need to edit them in Photoshop.
8. Save texture maps in standard formats as well as Ptex
The underlying map lookup in XGen is based on Ptex, a texture format developed at Disney. Ptex has plenty of advantages over canonical UV mapping. The main one is that it is distortion-free, as each of a polygon’s faces are projected one by one, and mapped into a single texture file.
The disadvantage is that PTex textures are topology-dependent. Change even a single face of the mesh, and you will probably need to proceed with a transfer. If you have many maps driving your rig, this can be a pain.
In Maya, when you paint a map, you are actually using Maya’s own 3D paint tools on classic UV sets. When you press the Save button, Maya automatically converts the map into Ptex format. Make sure you save and archive the original, non-Ptex maps carefully. These can turn into life-savers when you need to transfer your groom.
Another thing to consider is that Ptex maps are not human-readable, since the texture patches are arranged randomly, without any spatial reference to the actual geometry. If you are going to need to edit your maps in an external application like Photoshop, having them archived in pre-Ptex format becomes even more important.
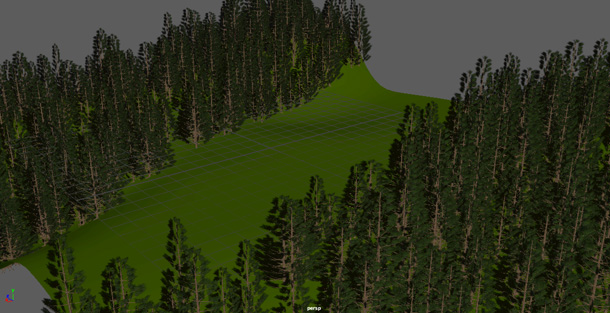
A set of trees instanced via XGen archives. You can export standard Maya geometry in a scene file as XGen archive geometry, enabling you to modify a base mesh and re-export it to create variation across instances.
9. Make good use of archives
Geometry instancing in XGen is achieved via archives. These are files that store the geometry for a single instance. You can then place the geometry over and over, in the same way you would XGen’s own primitives.
This is useful when you want to create, say, scales on a character or trees in a forest, since you only need to store the geometry in memory once, making it possible to create and manipulate extremely dense assets.
As with primitives, you can use guides, maps or expressions to control variations between instances. Again, I like to stay procedural where possible. Achieve a good overall look, then add detail progressively – for example, by modifying and re-exporting the instance using XGen’s Create MEL File option.
You may also want to animate the geometry: for example, to add a wind cycle to a tree. XGen can function as a basic sequencer, offsetting the animations via expressions. Use the $frame variable and the sky is the limit.
A completed XGen hair system. When constructing an asset for production, always leave scope to finesse extreme poses and simulation errors on a per-shot basis – by brute force, if necessary.
10. Build in breathing space for final changes
When working with the surface of animated assets, you are both modelling and rigging at the same time. As you build your static character you need to anticipate the behaviour of the instances in a range of animated poses.
In reality, it is very rare that your rig stand up to the complete range of motions a character performs, meaning that you need to apply fixes on a per-shot basis. It is paramount that you have a strategy for incorporating these fixes. You need to plan in a bit of ‘breathing space’ for final retouches.
This is the main reason I prefer procedural set-ups over non-procedural ones: at this stage, you are almost forced to use non-procedural techniques to straighten out the unwanted outcomes, and you don’t want the fixes to have knock-on effects. The best way of structuring the initial rig varies drastically from project to project, but the need to make it open to changes is universal.
 Stefano Giorgetti is lead character developer at Digital Domain, where his recent projects include Maleficent. He previously worked as a character TD at Framestore, on movies including Harry Potter and Deathly Hallows, Clash of the Titans and The Chronicles of Narnia: Prince Caspian, and as a tools developer at Ilion Animation Studios on CG feature Planet 51.