5 expert tips to bring appeal to your facial animation
Subtle changes in expression can bring a 3D character to life. In this article, Walt Disney Animation Studios senior animator Chatrasal Singh provides five expert tips to improve your 3D characters’ facial poses.
In animation, a character’s face, particularly their eyes, is what the audience is focused on most of the time, so a good understanding of facial posing is key to delivering appealing character performances.
A lot goes into creating strong, appealing facial poses, but the five tips below are all things that you can do to bring instant appeal to your own character animations.
To create the images, I used Sagar Arun’s Aisha character rig for Maya, available via AnimProps, but the tips themselves apply to any 3D animation software.
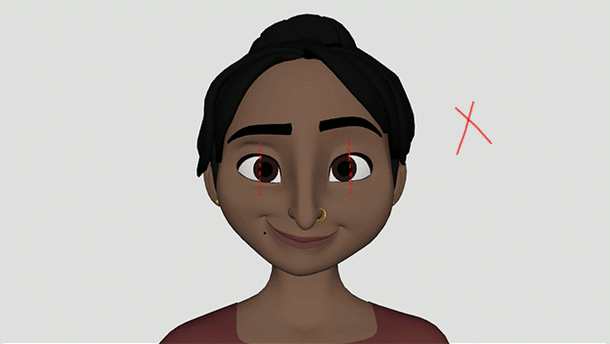
1. Choose the right head angle
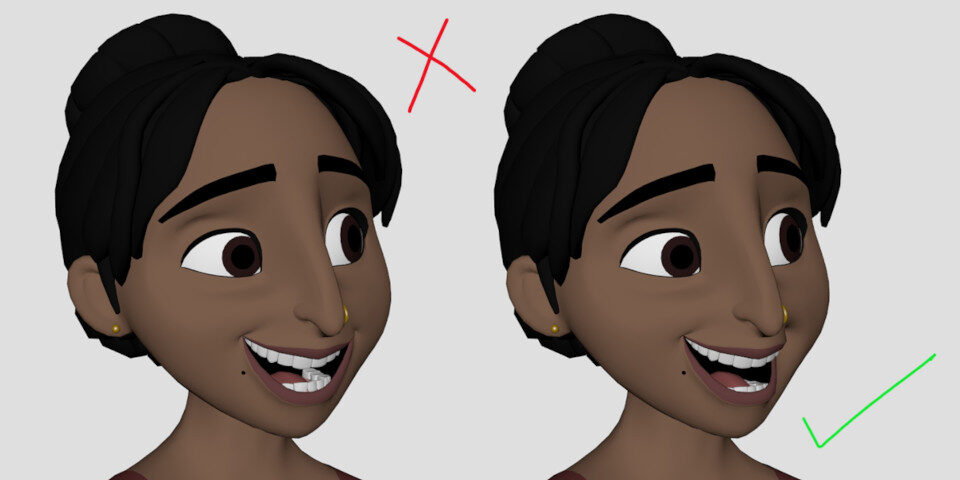
When you block out a shot, it is important to choose a head angle that makes the character look appealing.
This varies according to the design of the character and the mood of the shot, but in general, it is best to avoid having the character face straight into the camera.
You can see an example of this above. The character’s expression is the same in both images, but the image on the right is more appealing, as the angle of the head gives it more depth.
Positioning the head at an angle also shows an anatomically accurate connection between the head and neck, helping to establish a line of action going through the character.
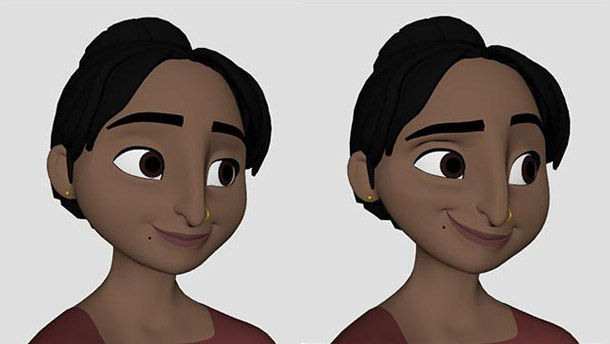
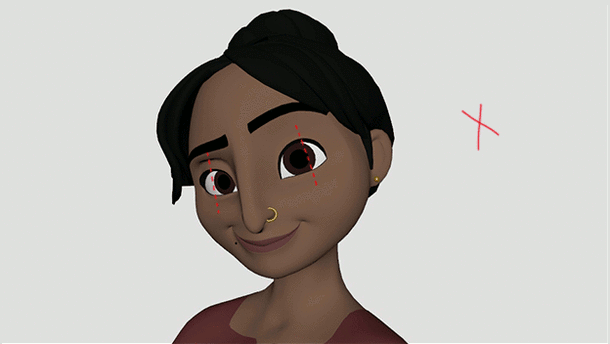
Here is the head from the other side, but with a more subtle change of viewing angle than the first example. In this case, I mirrored the expression and changed it slightly for the camera.
2. Use cone shapes to achieve asymmetry
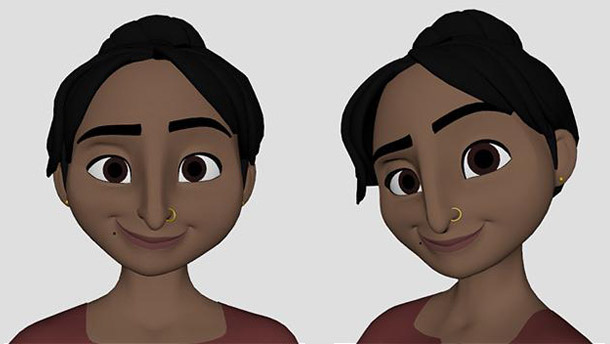
Don’t let the left side of your character’s facial pose mirror the right side exactly: in reality, facial poses are never perfectly symmetrical.
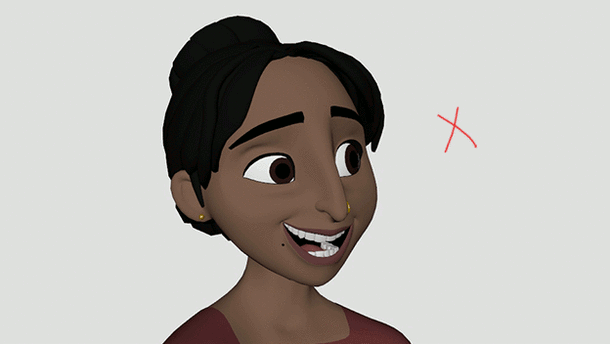
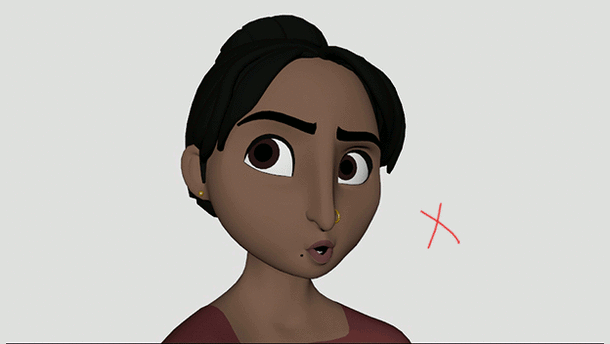
Sometimes, to give a facial pose asymmetry, I use cone shapes. This is where the character’s expression opens up in the direction in which they are looking (or in the opposite direction, depending on the mood).
You can see an example of this above. On the left, the character is looking to the right of the screen without their expression opening up; on the right, their expression opens up in the same direction.

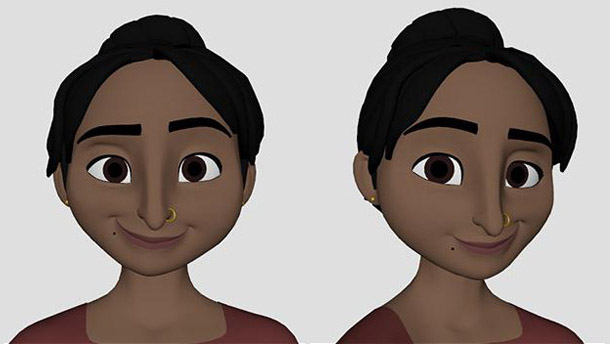
If you were to draw four imaginary lines going through the character’s brows, eyes, nostrils and mouth, the first expression would look something like this. All of the lines are parallel to one other.
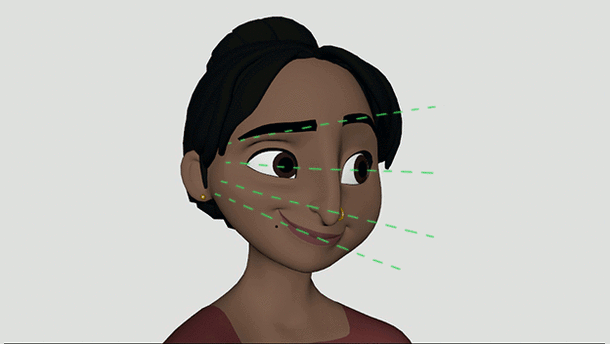
If you adjust the expression so that the same four lines form a cone with the open end pointing in the direction that the character is looking, you achieve asymmetry, and a very appealing facial pose.
3. Adjust mouth shapes to wrap the lips around the teeth
Although they were producing 2D drawings on paper, traditional animators created mouth shapes with an appealing sense of three-dimensionality. Paradoxically, when posing characters in 3D software, we often lose this dimensionality, as we don’t get the feeling that the lips are wrapped correctly around the teeth. This is especially true when posing characters in three-quarter views.
In the example above, notice how I hid the far corner of the lips to give a sense that the lips wrap around the teeth. I also hid the lower back molars behind the tongue. This helps the pose look more three-dimensional.
Another example, this time using the ‘oo’ mouth shape. Hiding the far corner of the lips, and really getting a good pucker can help sell the mouth shape better. For the ‘oo’ viseme, I like to hide any teeth, as they don’t really add anything to the shape. Even in reality, when we form an ‘oo’ shape, we rarely expose our teeth.
How far you push the shapes will obviously depend on the style of the show, but these examples should help you make more distinct choices.
4. Balance the whites of the eyes
Probably the trickiest part of facial posing is to get the character’s eyes looking believable. Often, when you move the eyeline to the left or the right, the results are not at all appealing: the eyes have an unconvincing shape, and the character may look cross-eyed or wall-eyed.
To get a believable eye pose, you need to adjust the eyelids so that the whites of the eyes are balanced. (You may also need to adjust the iris/pupil control, as one of the irises might appear smaller than the other.) The main thing is to have the same balance of eye white and iris on each eye.

Above, you can see an exampe of the facial pose you get by default, and how scaling the iris and adjusting the eyelid shapes can help you create a more appealing eye shape. Note that this is done by adjusting the individual eyelid and iris scale controls, rather than translating or rotating the eyeballs themselves.
With extreme angles like this, you may find that the pupil of the far eye starts to get buried under the eyelid. To counteract this, adjust the shape of the far eyelid, and try to match the balance in the other eye.
5. Maintain correct eyelid peaks
A final, more advanced tip: positioning the ‘peak’ of the eyelid correctly can be the key to achieving an appealing facial pose, and in informing the audience where your character is looking.
Where to position the peak will vary according to the design of the character, but in general, you want it to track the pupil as it moves.
Above, you can see an example of the eyelid shapes you get from the rig by default (red), and after manual adjustment (green). I usually translate the main lid control to reposition the peak, and give it a better shape.
Again, compare the default eyelid shapes (red) with the shapes I got by translating the main lid control in the X-axis to adjust the peak and line it up with the pupil, giving they eyes a more appealing shape.
Bonus tips
A few more tips to help improve your facial posing:
○ Have a mirror on your desk at all times. Analyse how each part of own your face behaves.
○ Do life drawing. If you don’t have access to a live model, draw from images.
○ Use video reference to analyse subtle facial expressions frame by frame.
○ Reference traditional animation for mouth shapes. Try to reproduce that dimensionality in your work.
Adopting these habits as part of your day-to-day routine will give you a better understanding of facial anatomy, and help you to create strong, believable facial expressions for your characters.
 About the author: Chatrasal Singh is a senior animator at Walt Disney Animation Studios. He has over 15 years’ experience in feature animation, at studios like DreamWorks Animation, Weta Digital and Base FX. He is a Board Manager in the Visual Effects Society’s LA section. Watch Chatrasal’s demo reel and check out his IMDb profile.