How to create an undersea digital matte painting
In this article, I’m going to explain my workflow for creating a digital matte painting, using a real asset from the short film The Space Between Us. I also did the production design and concept art for the movie, but the matte painting shots were always great to work on. I love the impact these kinds of shots can have.
This matte painting is from the final sequence where the audience sees the underwater world for the first time, so it needed to have the ‘wow’ factor. During the shot, the heroine sinks down into this world, and a creature swims out to help her. The world she has entered is his home, so in design terms, the two had to match.
You can see the finished shot at the start of the demo reel above. Below, I’ve broken down the process of creating the matte painting into 10 key stages. Click on any of the images to see it at full size.
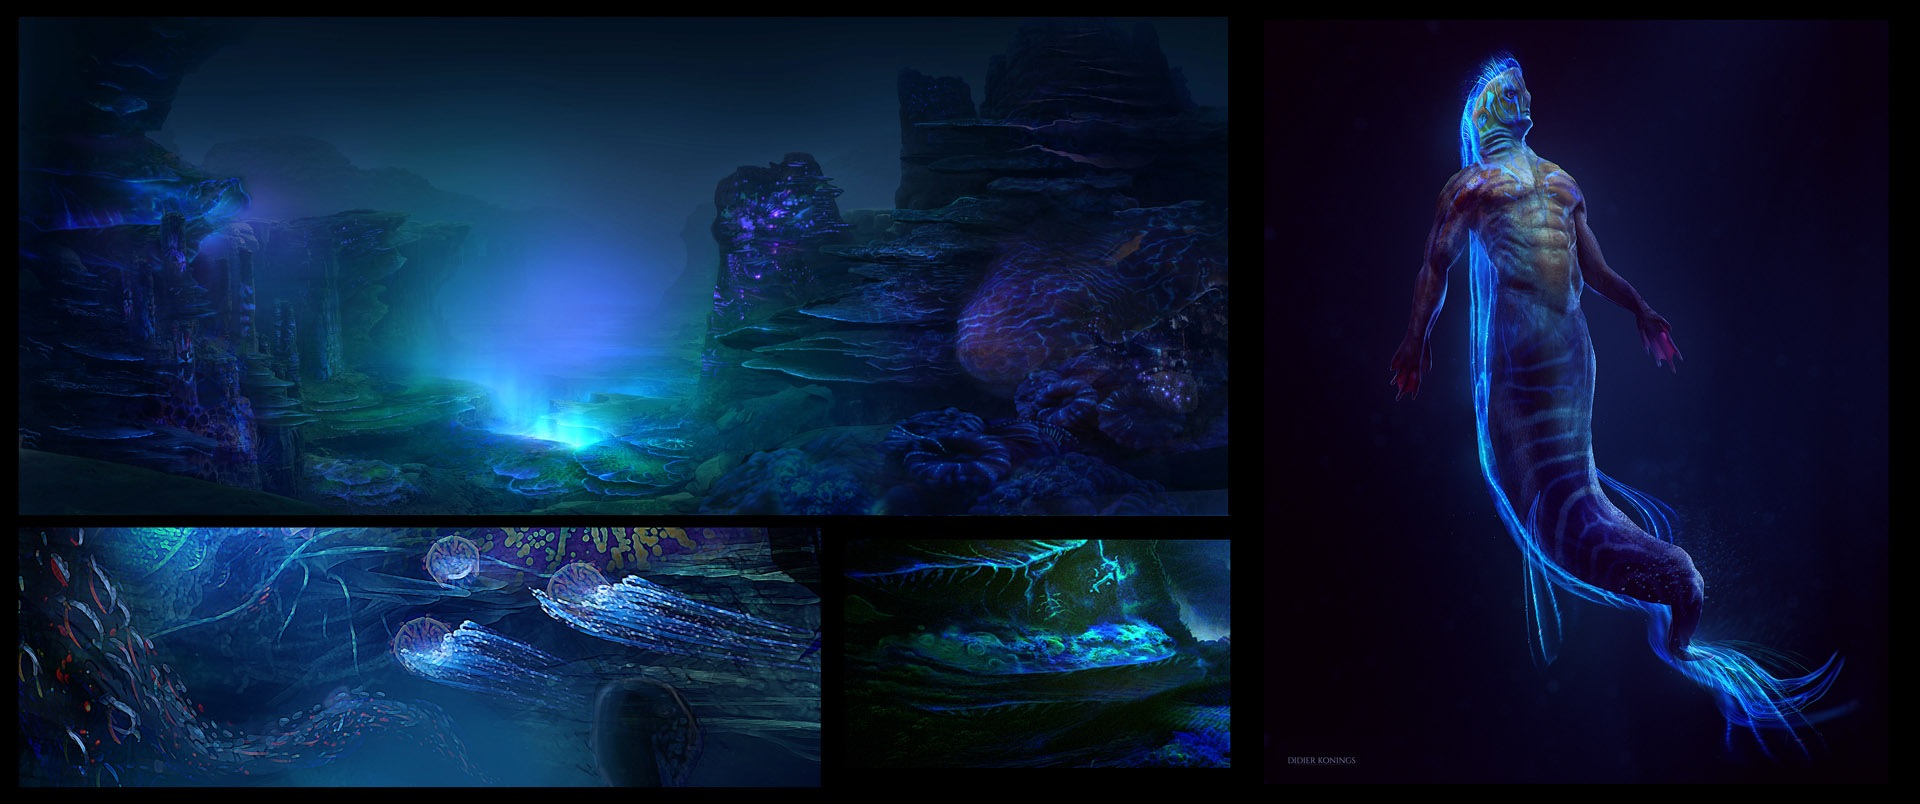
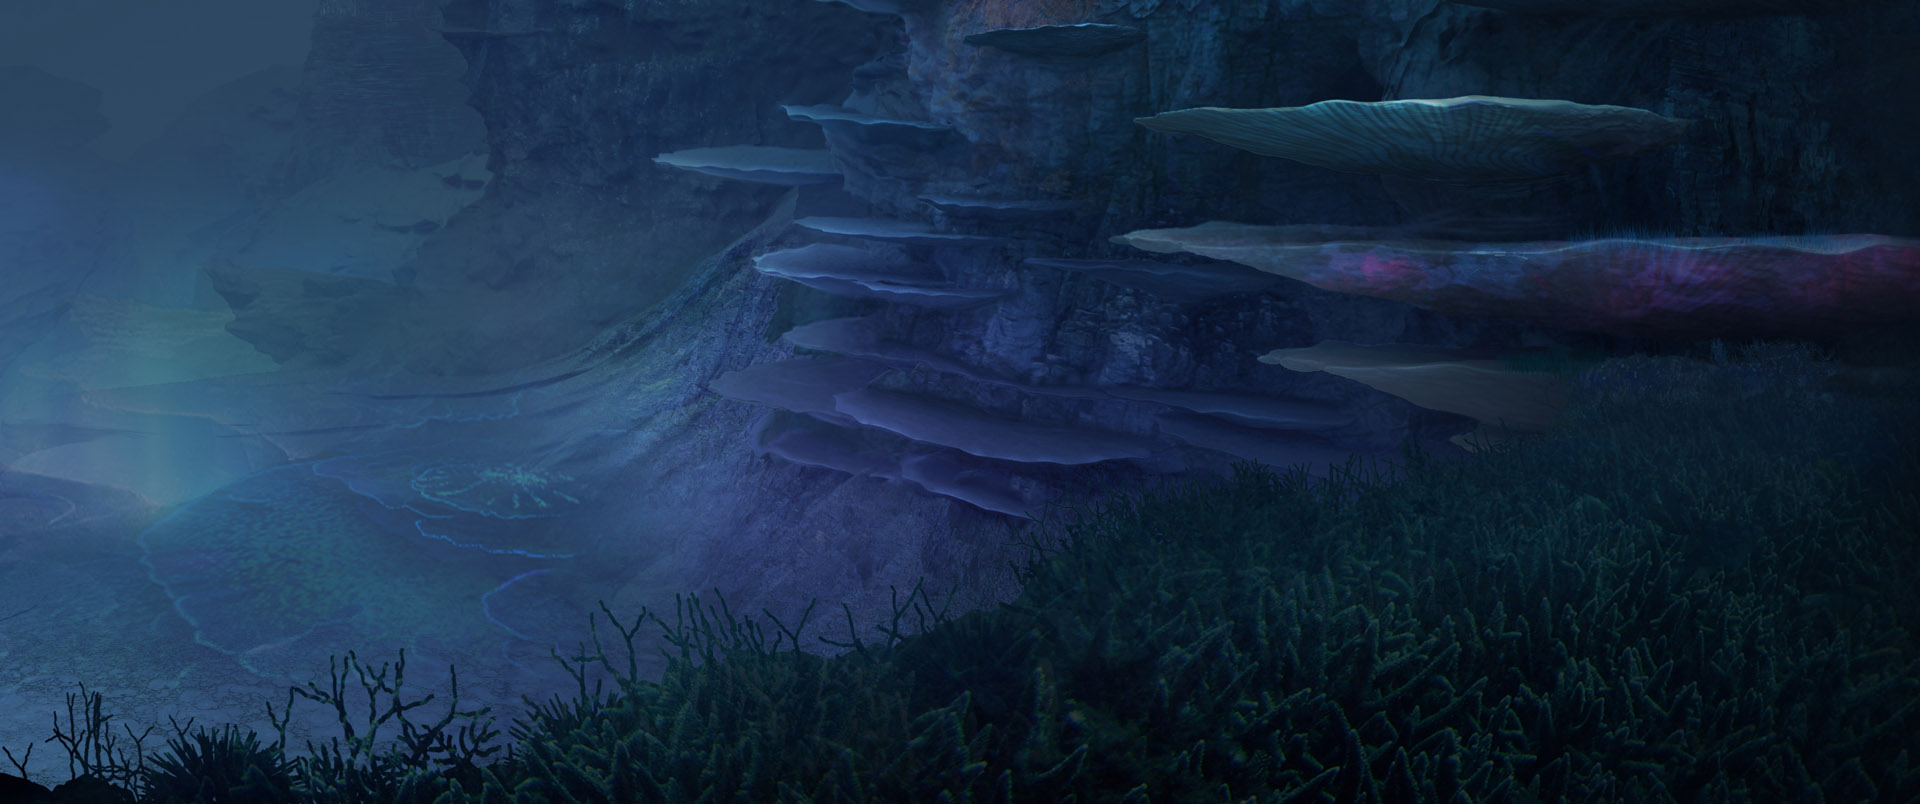
1. Early concept
As well as doing the final matte painting, I designed concepts for the environment. This was a chance to explore new shapes and structures. In the story, this is the only place on Earth where life could exist, so that gave me the idea of a magical source of life energy flowing out of an underwater canyon.
Because the creature (right) has to look like he fits into this world, he ended up with the same kinds of colours as the environment, with the same blue energy flowing through his body.
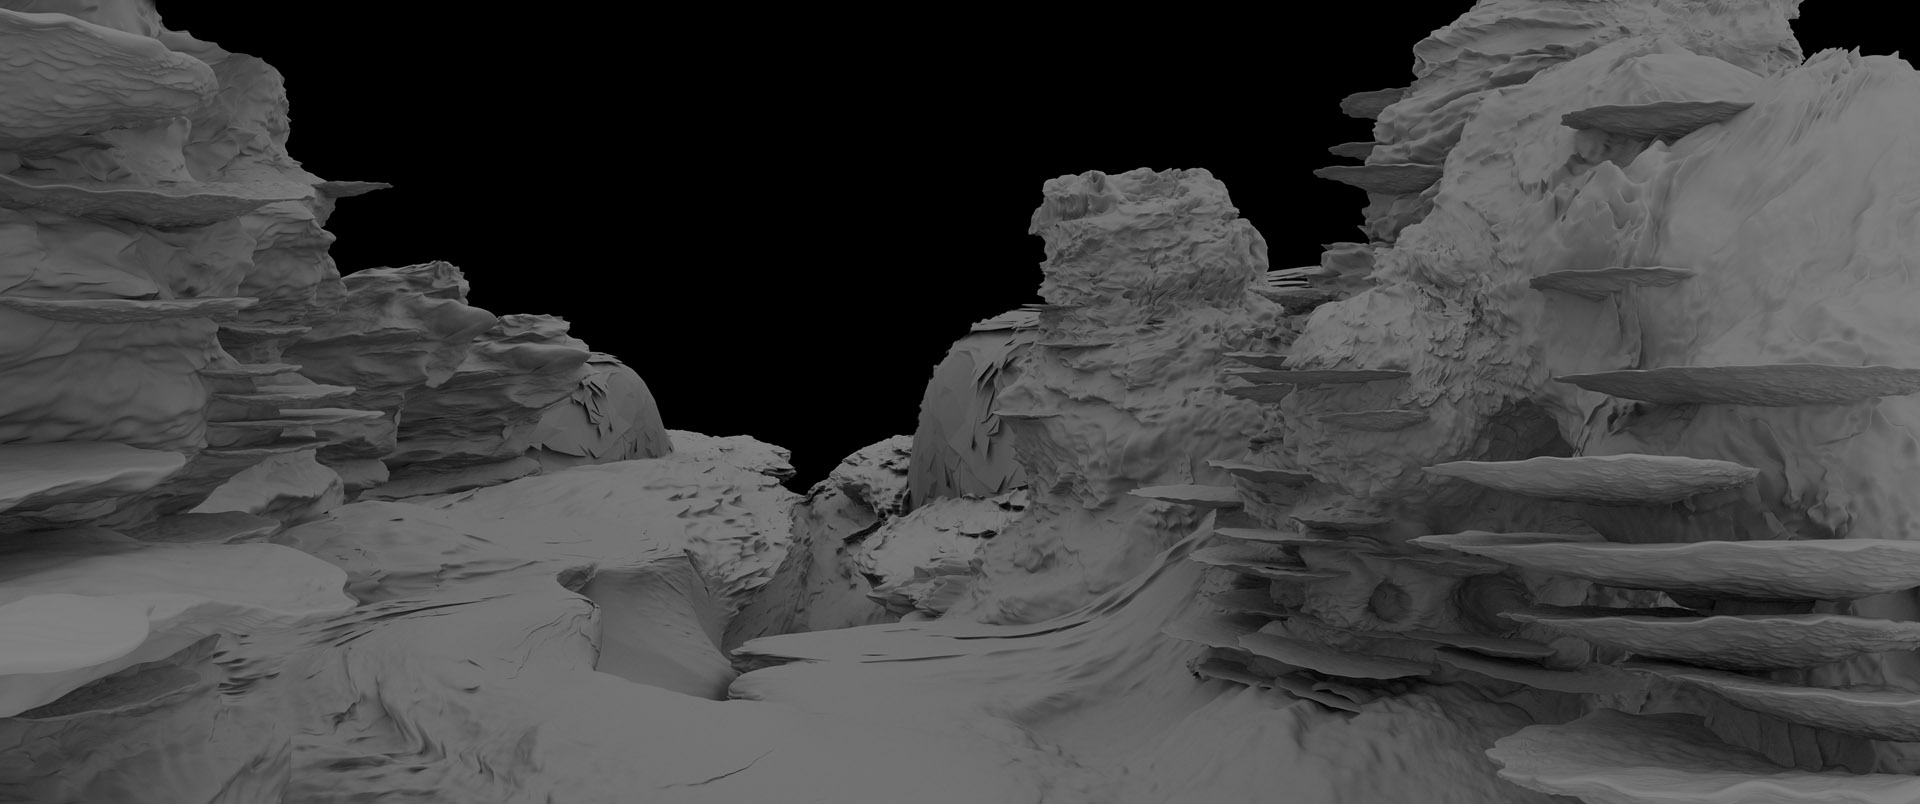
2. 3D setup
After Marc, the director, approved the concepts, I could start blocking out the shapes in 3D. Because this world is made up of bizarre organic structures, ZBrush was a good tool for quickly creating the initial shapes.
After creating some assets like rocks and coral, I placed them in a Maya scene, scaling some of the rocks up or down to balance the composition. The process of finding the right composition runs in parallel with that of establishing the proper camera angle once all the assets have been positioned.

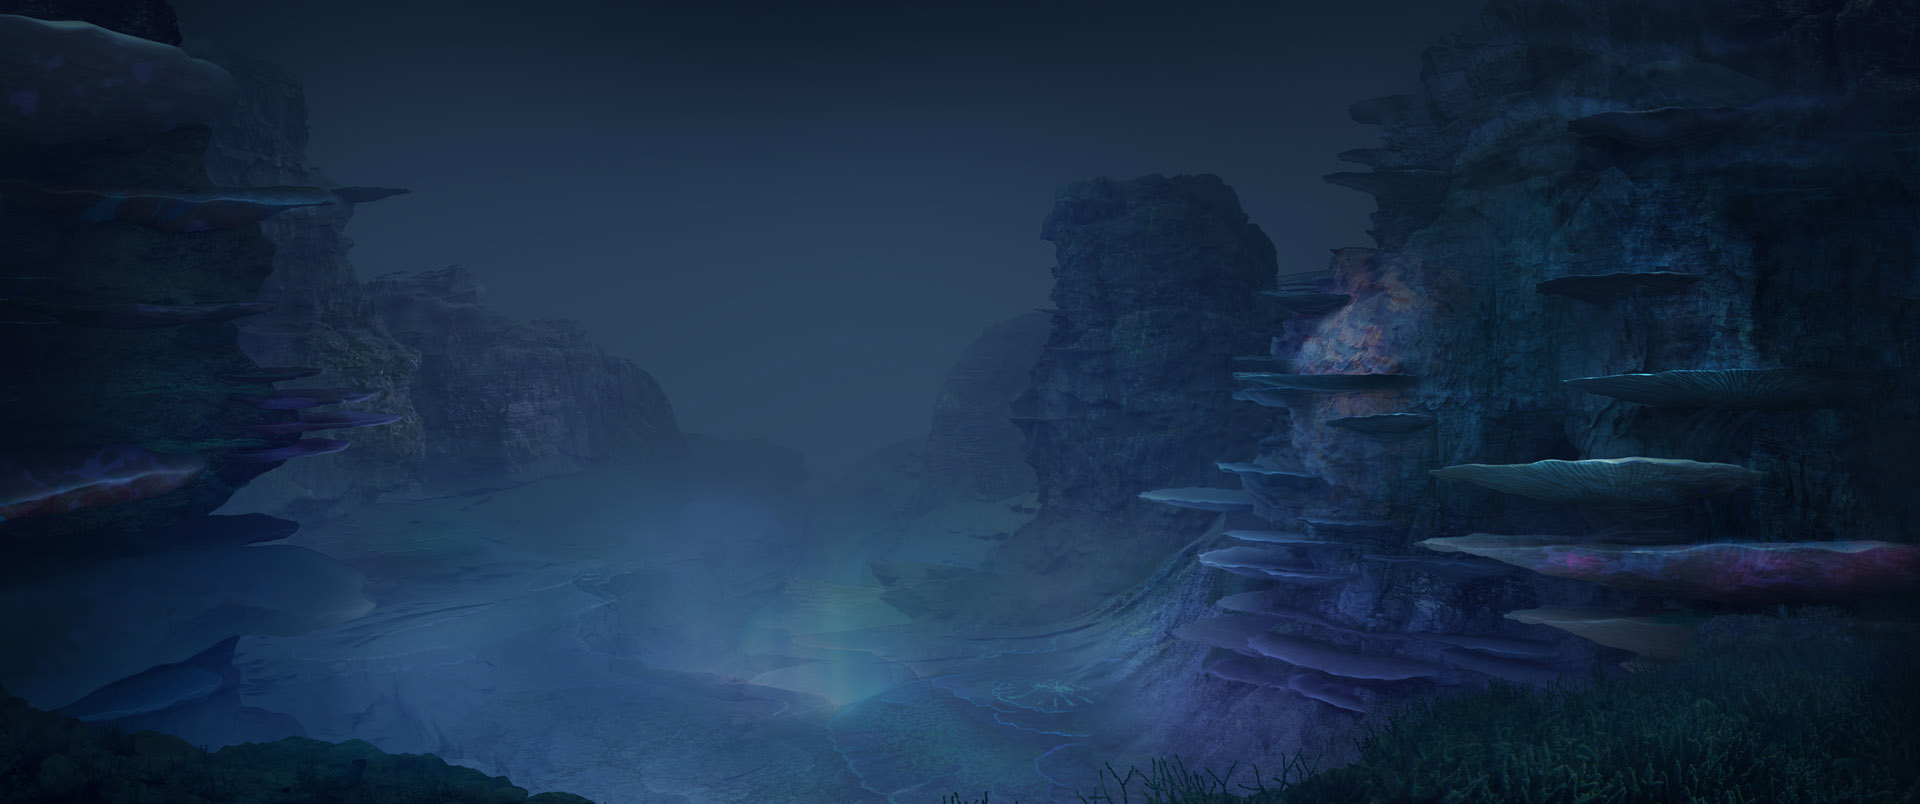
3. Render passes
The canyon contains the main light source for the scene, so it was helpful to have a basic lighting set-up in 3D. Working in 3D is a great advantage, because by rendering out a range of render passes and compositing them to create the final image, you gain more control over the result.
A depth pass (left) was a must for creating the underwater haze. The Object ID pass (right) enabled me to make mask selections in Photoshop more easily, enabling me to place photo elements within individual objects.
4. Colour pass
When I had all the layer passes and alphas sorted into folders, I was ready to start the 2D part of the digital matte painting work in Photoshop. I began by importing all of the passes as separate layers, and adjusting layer opacities and blending modes to give everything the right colours and values.
In this phase, the crucial thing is making the image readable, changing elements in the composition to give a good visual flow. I also blended in the depth pass to add some atmosphere.
5. 3D layers
By this point, there may be nothing left of the 3D set-up, but it’s still a good guide for the 2D work. Most of the time, you would texture your 3D elements, but for this painting, the 3D was mostly used for reference for scale, perspective, and foreshortening. Using 3D also helps fight the battle when the image is becoming too flat.
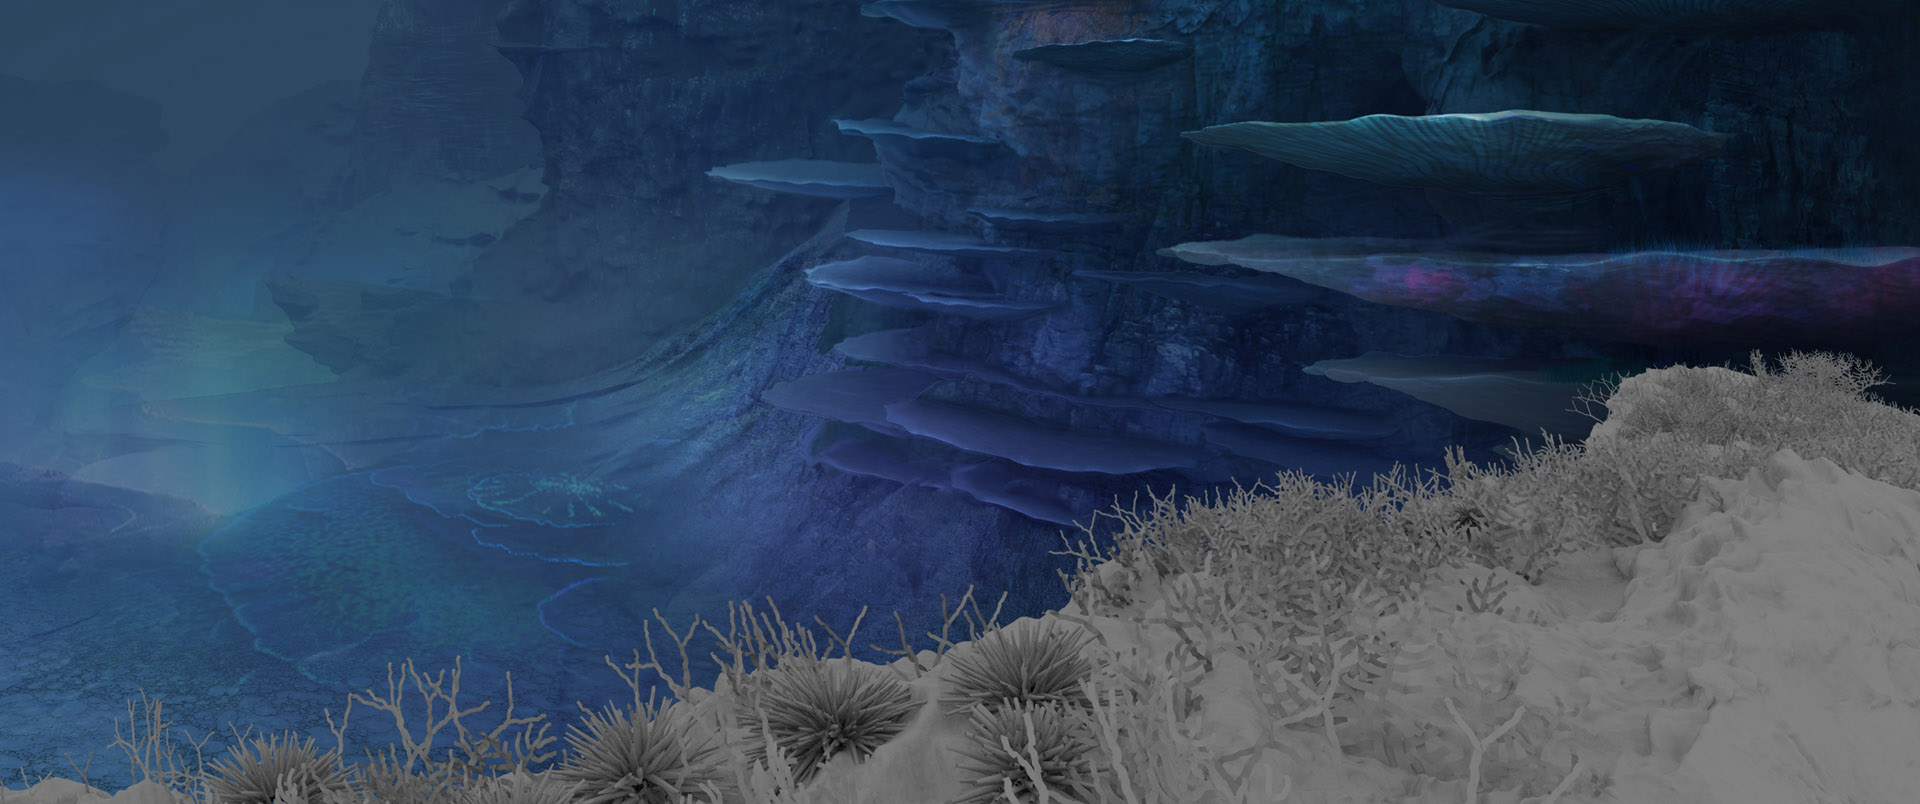
6. Photo elements
Next, I began to incorporate photographic elements into the image. Every artist should have a reference folder with high-quality photos ready to use. I use a two-monitor set-up with Adobe Bridge on my left screen, enabling me to browse through thousands of photos of things like rock textures.
I quickly created masks for each object in the scene from the Object ID pass. I usually add my masks to a Photoshop Layer Group so that I can drop photos or textures right in, positioning each one so that it fits correctly onto an object. I then look at the black and white levels to find the right balance. Most of the time, I use the Levels adjustment to match the colours.
7. Painting details
With the textures in place, I began zooming in on sections of the image and painting in the details. This is the part of the work I enjoy the most: it brings the painting to life.
Finding the right balance is key. If you want something to look photorealistic, you need a high level of detail, but there is a fine line between that and over-detailing, making the image look crispy.
In this case, the main difficulty was mimicking the way that light from all the different light sources would interact. In addition, all of the lights had to be soft and diffuse because of the way that water spreads light. Most of the light in the image was hand-painted.
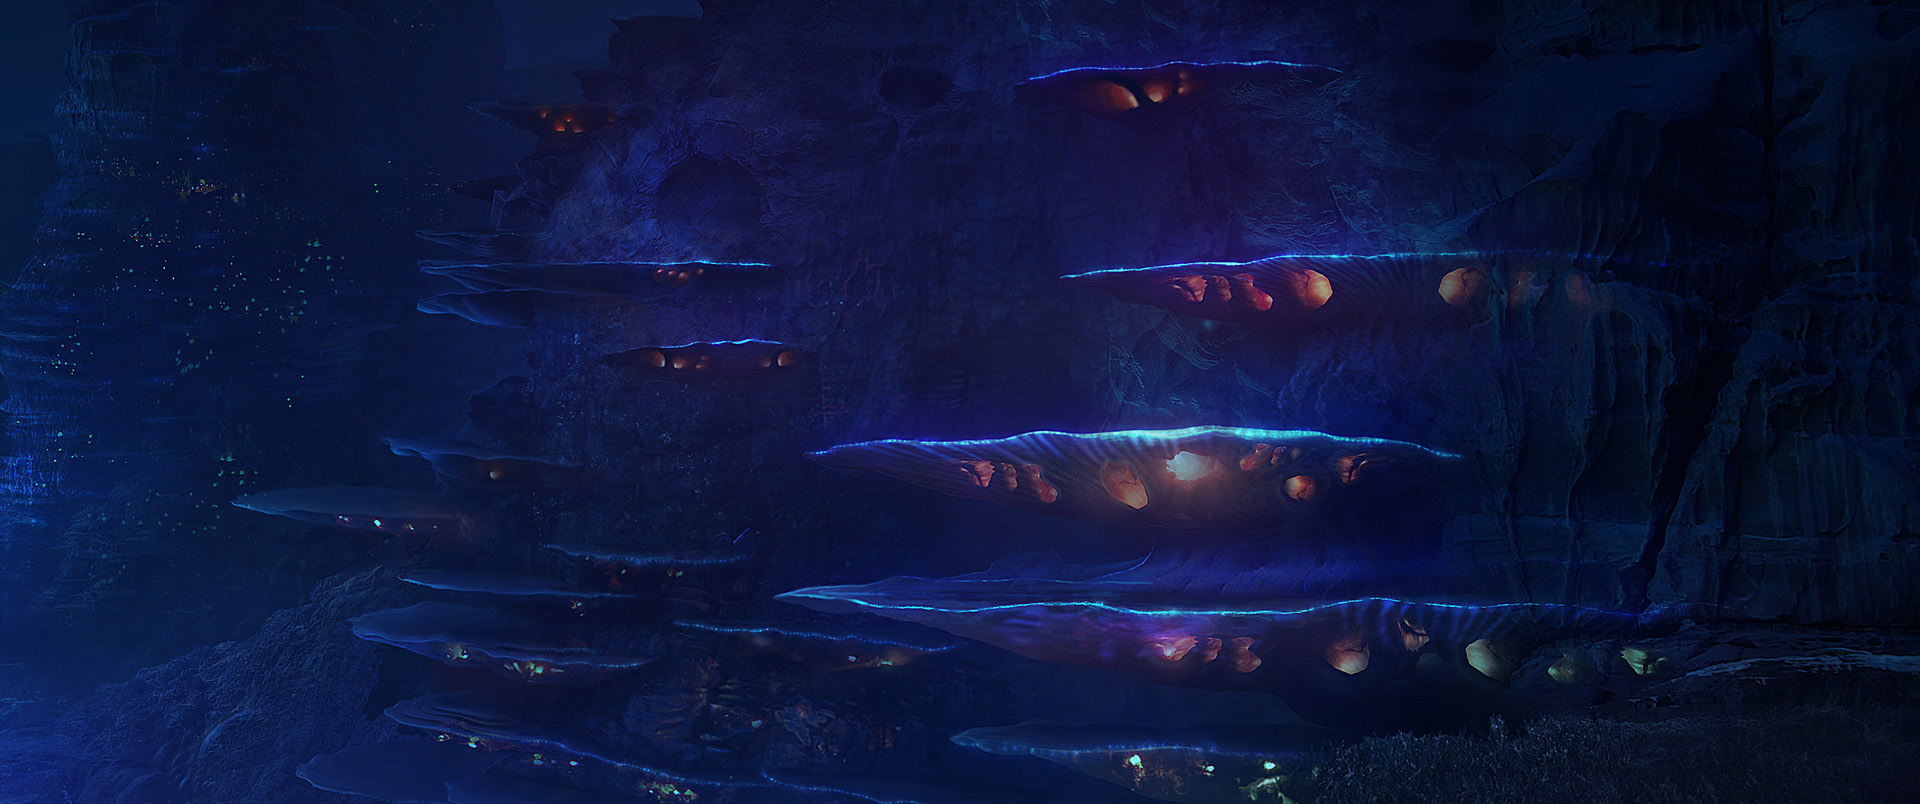
8. Final matte painting
By this stage of the work, the Photoshop file contains a lot of different layers. When the shot is cleaned up, you want to merge as many of those layers together as possible.
In this project, the main remaining layers were the foreground, mid-ground and background: a set determined by the way that the shot needed to be projected in 3D in the final composite. There were also layers that needed to remain separate for animations in the comp. I still had all of the alphas from the 3D render passes, so it was simple to get everything ready for export to Nuke.
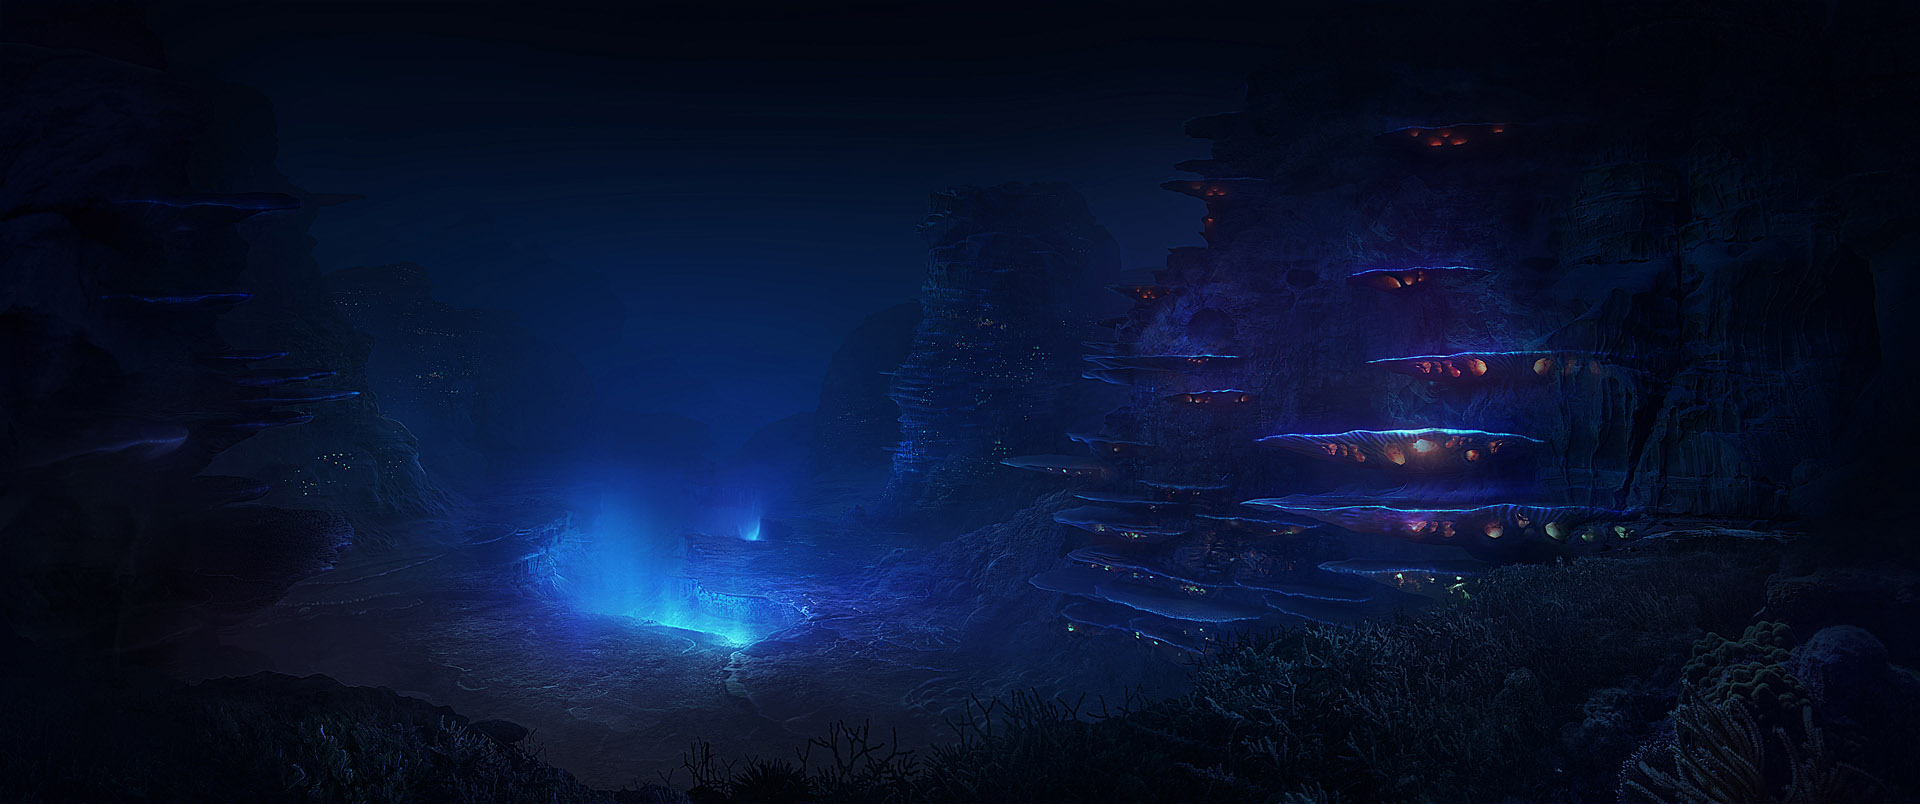
9. Paintover
Along with the finished matte painting, I created a paintover so that the compositing department had solid reference for where to take the shot. I also blocked out where the fish should be in the final comp.
In work like this, it’s important to find the balance between realism and aesthetics. In reality, the maximum distance from the camera at which objects remain visible would be much lower, but we wanted to show the entire world, so some compromises had to be made.
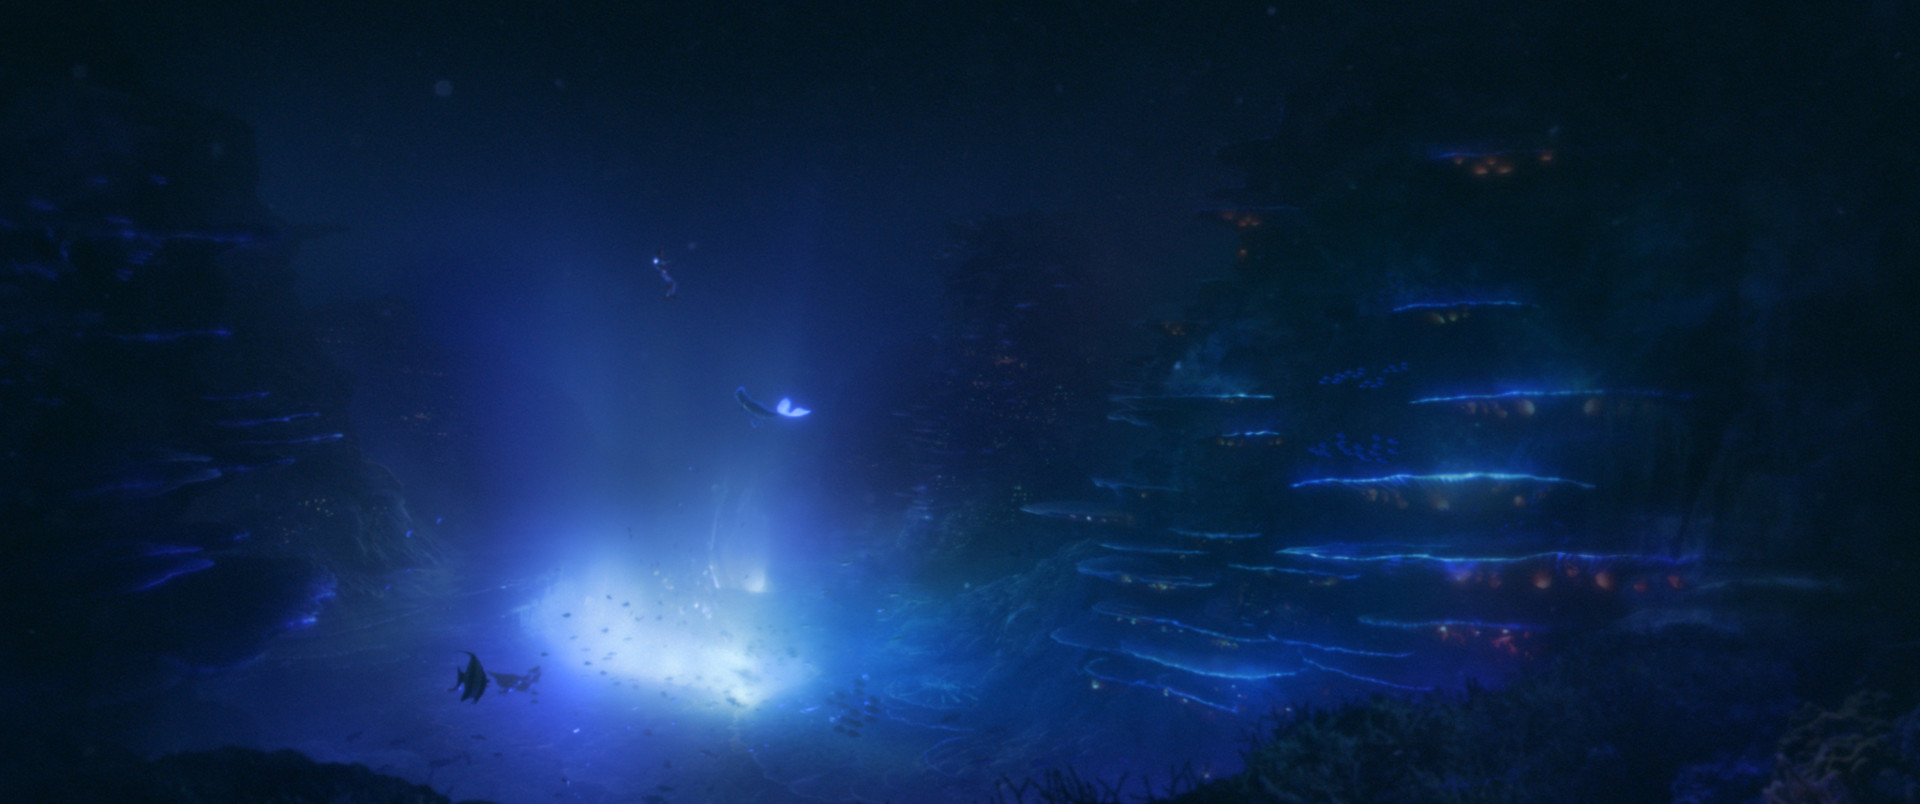
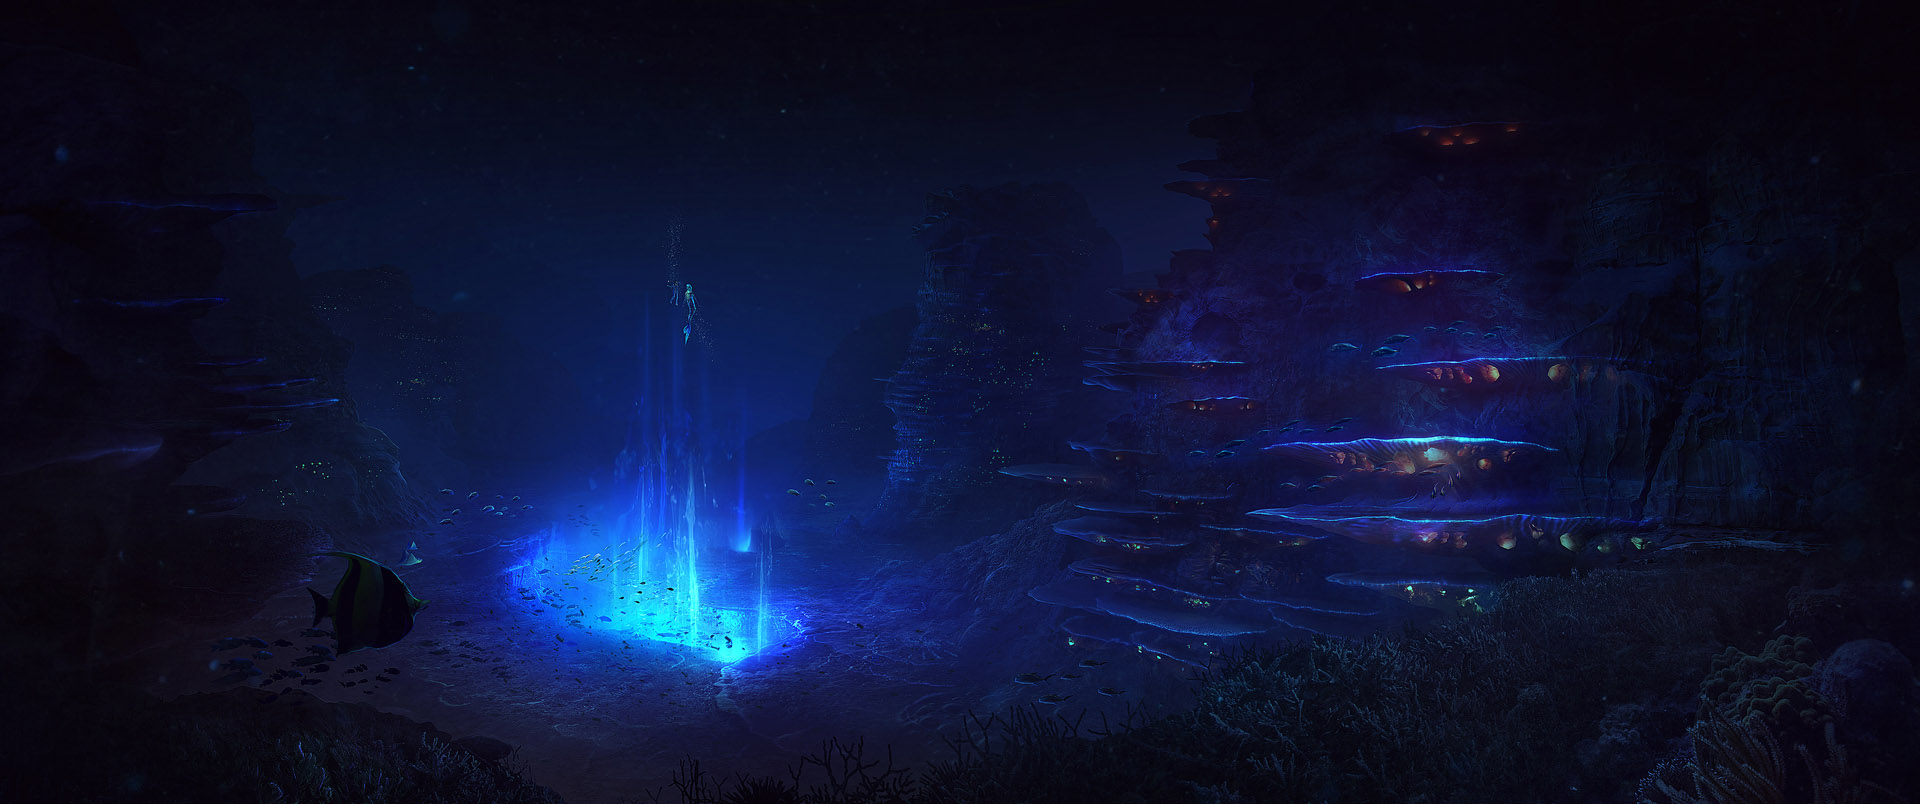
10. Final composite
Elements like the glowing energy and other light sources were delivered separately to the compositing department so they could be animated in Nuke via alpha channels or distortion effects. I also shot particles and milk droplets inside a water tank so we had some live-action elements to use.
Based on my animations, the effects department created hundreds of fish for the background of the shot using a flocking plugin. I also animated the Moorish idol swimming in the foreground. It was part of the original concept, and helps to sell the scale and depth of the environment.
 About the author: Having specialised in digital matte painting and concept art during his studies at the Netherlands Film Academy, Didier Konings is currently lead digital matte painter at the Aaron Sims Company, where he has worked on upcoming movies including Pirates of the Caribbean 5: Dead Men Tell No Tales. You can see more of Didier’s work on his website