The Turn of a Screw!
THE TURN OF THE SCREW
It never fails. No matter how many features they cram into animation software – and there’s a lot crammed in nowadays – sooner or later, the creative user will say, “It won’t do the one thing I really want.” Fortunately, today’s packages give us the means of bypassing the graphical user interface altogether and get right into the guts of the system. I refer, of course, to scripting.
LightWave, Maya, and SoftImage offer script interpreters in their packages so the savvy user can tweak the graphics engine to the heart’s desire. LightWave calls theirs LScript and Maya calls theirs MEL (Maya Embedded Language) Script. They sound almost exactly the same, so enuciate when you say that, pardner. To be exact, you’re always driving the graphics by script commands, even if you don’t know you’re doing it. Want proof? Open the Maya Script Editor and take a look. There’s the list of all the commands which drove the current session.
Every time you click on an “OK” button or moved an object or did something else, the GUI sent a command to the Maya internals. That’s why it’s so easy to enter commands on the Command Line at the bottom of the main window – the GUI’s going to enter a command anyway. Of course, it’s a 2 way conversation. The window next door is constantly talking back to you, and it’s mostly complaining. (Ever notice how every time the output field turns pink, something bad happens?) Not only are you driving Maya interactively with MEL, but you’re doing the same with MEL script files. Every .ma scene file you save or read is actually a collection of MEL commands.
LScript wasn’t designed to be quite as interactive as MEL, but you can use it that way if you know the secret.
In Layout, select Layout > Commands > Command History. There’s the list of all commands generated by your activity in the GUI. Want a cheap thrill? Keep the History window open and keep working. Every time you do something more in Layout, its command pops up in the History window. If you want to type in a command, select LScript > LS Commander. Helpfully, you can just copy from a list of canned commands – just right-click on the command.
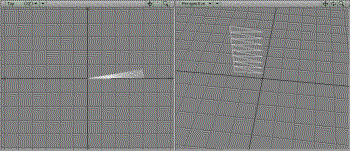
But if you want to get some real work done, you need the full programming abilities of a batch script. To demonstrate, I’ll describe how I constructed an LScript for an actual project. Why I wrote it: I needed to model a spiral surface for a screw machine part, thusly:
Now my version of LightWave has a nice Helix function in Modeller, but that only creates a curve, not a polygonal mesh. After fussing with various attempts to create one by creating and twisting polys, it finally occurred to me that this was one time when it would be easier to do things mathematically than manually. So I dusted off my copy of LSed (LightWave Script EDitor) and went to work.
Maya and LightWave approach scripting somewhat differently. MEL is a highly generalized language, with its scripts combining scenes, geometry, and everything. LScripts tend to be more specialized. An LScript written for Modeller won’t work in Layout, and vice versa. The nice thing, though, is that LScripts come in several useful flavors. You can set an LScript to run once when activated, or to sit in the background waiting for some condition to happen,whereupon it springs into action.
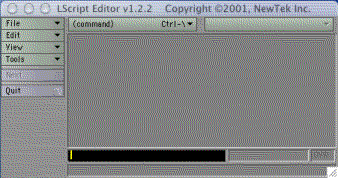
Activate Modeller and size the window so it doesn’t take up the entire screen. Hunt down in the file tree where LightWave was installed and find LSed in the Programs folder. Activate it. A small window pops up:
It looks like no more than a text editor. Actually, it is a text editor. So why not just use an ordinary text editor? You could, but LSed gives you a little bit extra: the means of checking your script’s syntax before
loading into LightWave. LightWave, of course, can check syntax, but it saves a couple of steps to do it in LSed.
So we’ll use LSed. Select File > New. click the cursor in the blank space, and we’re ready to type.
We want to create geometry, so let’s start creating some vertices. Type:
main { addpoint (0.0, 0.0, 0.0); addpoint (1.0, 0.0, 0.0); addpoint (1.0, 0.0, 1.0); }
The numbers, not surprisingly, are the XYZ locations of three points which we want to create. You can use tabs to indent. LSed won’t mind, and things will look cleaner. Select File > Save As, and save the file. I have a folder called “Scripts” in my personal folder, next to “Models”, “Images”, “Movies”, and “Scenes”. Name the file
something descriptive, such as Spiral or Screw. LSed will automatically put the .ls extension on the filename. The LScript must have that, or LightWave won’t use it. Now go into Modeller and select Construct > LScript > LScript.
Select Spiral.ls. Modeller now reads the file and executes it. Or rather, tries to execute it. Instead, an error pops up, complaining that an illegal Mesh Edit Operation occurred during the Command Sequence. Sorry, I forgot to mention. Modeller works in two different modes. Mesh Edit is the creation of geometry, and Command is the editing of existing geometry. You can’t have both at the same time.
So to put Modeller into creation – excuse me, Mesh Edit – mode, go back to your LSed window and add a couple of lines:
main { editbegin (); addpoint (1.0, 0.0, 1.0); addpoint (1.0, 0.0, 0.0); addpoint (0.0, 0.0, 0.0); editend (); }
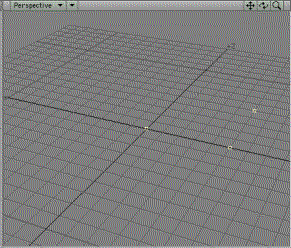
To make sure everything’s fine, select Tools > Check Syntax. LSed will parse what you’ve typed and report whether there’s any syntax problems. Even if it passes, there’s no guarantee that the script will run right, but at least it catches syntax glitches. If things look good, save the file and feed it into Modeller. Ah, that’s better. No gripes this time, and we actually have some points staring at us in the viewports. If you don’t see any points, select them in the Point Statistic window. Just click on the + next to 0 Polygons. That should do it.
Well, that’s nice, but we wanted polygons. So go back to LSed and tweak the addpoint commands. What I didn’t mention is that addpoint returns the identifier of the created point. If we save those, we can create polys from them. So:
main { editbegin (); points[1] = addpoint (1.0, 0.0, 1.0); points[2] = addpoint (1.0, 0.0, 0.0); points[3] = addpoint (0.0, 0.0, 0.0); addpolygon (points); editend (); }
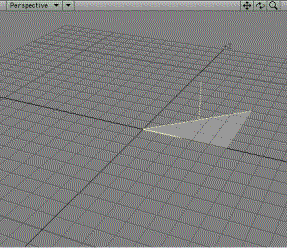
This creates a variable called points. The brackets make points an array, storing any number of values. We feed all those values into addpolygon, which creates a polygon connected by the points. The order of points going into the polygon determines which side is visible. A clockwise ordering makes the polygon sided in one direction, counter-clockwise makes it sided in the other. Anyway, undo the last object in Modeller, feed in the new script, and voila, a small triangular polygon appears.
To make a spiral surface, we’ll need a lot of polys. Let’s see… we need a structure which describes a circle while moving up at a steady rate. We’ll set the vertical axis to Y and the circular plane to XZ. There should be 2 sets of points: a center pole and the spiral. Let’s start with something simple (always a good rule in programming) and create the center pole. A simple for loop will create as many points as we want.
main { editbegin (); py = 2.0; for (i=1; i<10; i++) { addpoint (0.0, py*i, 0.0); } editend (); }
The for loop syntax is very much like C. We set variable i to 1, and increment it on each pass through the loop, ending
when i becomes 10.
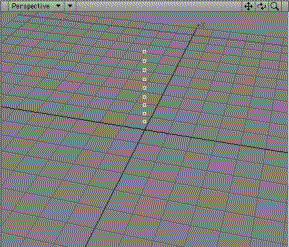
On each pass the loop creates a point with x = 0.0, z = 0.0, and y equals i times an arbritrary py value. Don’t worry about mixing integer and floating point values in the expressions, LScript converts everything to floats.
The spiral curve will be a bit trickier. LScript provides a variety of mathematical operators, so we’ll use a couple of the trigonometric ones:
main { editbegin (); up = 2.0; for (i=1; i<10; i++) { py = i * up; addpoint (0.0, py, 0.0); px = cos (i); pz = sin (i); addpoint (px, py, pz); } editend (); }
I broke out the py calculation because it would be redundant to do the same calculation in both addpoint commands. Run this script, and we have 2 sets of points.
Hmm… the spiral doesn’t seem very wide. Time for some scaling. Change the px and pz lines to:
radius = 8.0; px = radius * cos(i); pz = radius * sin(i);
That’s better. If you’re not sure what’s going on, it’s time to do some debugging. After the 2nd addpoint command, add the
following:
info (“PX ” + px + ” PY ” + py + ” PZ “);
When LightWave hits the “info” command, it stops execution and displays the items listed. Anything in quotes is a literal text and anything else is replaced by the current value of the variable. Since the “info” is inside the loop, I’m afraid that it’ll run every single time through the loop, so you’ll have to keep clicking to get rid of them.
Once you’re happy with the information, put double slashes at the beginning of the line in the script:
// info (“PX ” + px + ” PY ” + py + ” PZ “);
The slashes turn the line into a comment.
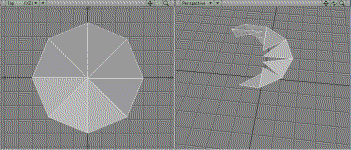
Now, In order to create a series of polygons, we need a series, or array, of points. Make that 2 arrays – one for the center points and another for the spiral. The polys will share points thusly:
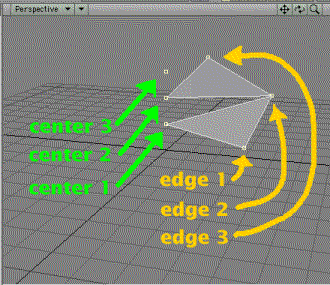
So the first poly will need center point 1, edge point 1, and edge point 2. The 2nd poly will need center point 2, edge
point 2, and edge point 3. After a little thought, we change the first addpoint command to:
centers[i] = addpoint (0.0, py, 0.0);
No big change, we’re just storing the point IDs in a new array. Now do the same for the 2nd addpoint:
edges[i] = addpoint (px, py, pz);
Since the 1st poly needs 3 points before it can be created, we need to delay the process until after the first two points.
There are 2 points created simultaneously, so we only need wait until the 2nd pass through the loop. So after the 2nd addpoint, add the following block:
if (i>1) { j = i – 1; tri[1] = centers[j]; tri[2] = edges[i]; tri[3] = edges[j]; addpolygon(tri); }
If you’re getting odd syntax errors, be sure that you have spaces in the script as shown. LScript can get pretty cranky on that issue.
Why are the polys so wide? A quick trip to the reference book tells all. LScript’s sin and cos functions expect radians as arguments, so even small values give huge angles. If you think in degrees, as do I, you’ll want to convert. A radian is 57.2958 degrees, so we tweak as follows:
radius = 8.0; rads = i / 57.2958; px = radius * cos(rads); pz = radius * sin(rads);
Yikes! Now the polys are way too thin. It’s time for yet anotherfudge factor. Let’s say we want the steps to be, oh, 45 degrees:
radius = 8.0; deldegrees = 45.0; delrads = deldegrees / 57.2958; px = radius * cos(i * delrads); pz = radius * sin(i * delrads);
I use the “del” prefix to denote “delta”, which is mathspeak for the difference between 2 values. Each step is a 45 degree, or 0.79 radians, difference between the previous step and the next step.
The surface looks good, but you might be bothered by the gaps between the polys. Not to worry – our wish is LScript’s command. Let’s set up another series of polys to fill in the gaps. Hmmm… we need 2 tri polys before we can define a fill poly. That means means 3 spiral edge points. The fill poly will need 2 center points – the current and the previous – and one edge point – the previous. So inside the for loop just after the if block add:
if (i>2) { j = i – 2; k = i – 1; fill[1] = centers[j]; fill[2] = centers[k]; fill[3] = points [k]; addpolygon(fill); }
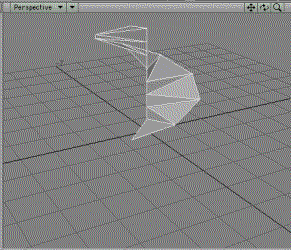
Lovely! I know, the fill polys are vertical, while the others are diagonal, but a little smoothing and no one will know.
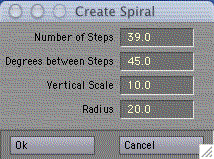
Our LScript is almost ready for production. Only one thing remains. We need to rip out the hard-coded numbers and let the user set the values. It’s easier than you think, because LScript also taps into LightWave’s GUI code. To display an input window, we have to put our LScript into request mode. That’s easily done with the “reqbegin” command. Here we go:
main { reqbegin (“Create Spiral”); c1 = ctlnumber (“Number of steps”, 39); c2 = ctlnumber (“Degrees between steps”, 45); c3 = ctlnumber (“Vertical scale”, 10); c4 = ctlnumber (“Radius”, 20); return if !reqpost(); nsteps = getvalue (c1); deldegrees = getvalue (c2); verscale = getvalue (c3); radius = getvalue (c4); reqend ();
Reqbegin stops execution of the LScript and displays a window with 4 fields for input. The first argument to the tlnumber
command is the prompt for the field. The second argument is the default value. (Why 39 steps? Ask Alfred Hitchcock.) If the user cancels the window, the LScript receives a not reqpost value, and the script ends on the spot. Otherwise, the values of the fields are retrieved and stuffed into our local variables. If you’re uncertain about the process, then put in an info command right after the reqend:
info (“nsteps ” + nsteps + ” deldegrees ” + deldegrees + ” verscale ” + verscale + ” radius ” + radius);
This will pop up a window confirming that the values are being set just fine. Once you’re happy, comment out the info command (you never know if you might need it again). Now take the values and substitute them for the hard-coded numbers in your script. Do that by setting this code just after the reqend command:
delrads = deldegs / 57.2958; editbegin(); for (i=1; i<nsteps; i++) { py = i * verscale; centers[i] = addpoint(0.0, py, 0.0);
and the rest the same. Run it, and enter values in the request window, if you wish, or stay with defaults. (Remember to press Enter or the value won’t stick.) And we have a spiral… but something’s wrong. There aren’t enough steps. Check the for loop, and we see the problem. The loop cycles, not through the number of steps, but through the number of pairs of center points and edge points. We need 2 cycles before one step appears. So we need to up the number of steps, and we need to set for loop to keep going until it equals that value. So change the above fragment to:
nsteps++; delrads = deldegs / 57.2958; editbegin(); for (i=1; i<=nsteps; i++) { py = i * verscale; centers[i] = addpoint(0.0, py, 0.0);
Voila! It works! Except… (don’t you hate exceptions?) It’s not starting at the origin. Well, that’s not surprising. py’s first value is 1 time the verscale. If we want to start at 0.0, we have to monkey around with py. Just before the for loop, add:
py = 0.0;
and move the
py = i * verscale;
line to just before the end of the for loop. Remember, in loops, values set at the end stay set when the loop starts over again.
Here’s the final script in its entirety:
main { reqbegin (“Create Spiral Surface”); c1 = ctlnumber (“Number of Steps”, 39); c2 = ctlnumber (“Degrees between Steps”, 45); c3 = ctlnumber (“Vertical Scale”, 10); c4 = ctlnumber (“Radius”, 20); return if !reqpost(); nsteps = getvalue (c1); deldegs = getvalue (c2); verscale = getvalue (c3); radius = getvalue (c4); reqend (); nsteps++; delrads = deldegs / 57.2958; editbegin (); py = 0.0; for (i=1; i<=nsteps; i++) { centers[i] = addpoint (0.0, py, 0.0); px = radius * cos(i * delrads); pz = radius * sin(i * delrads); edges[i] = addpoint (px, py, pz); if (i>1) { j = i – 1; tri[1] = centers[j] tri[2] = edges [i]; tri[3] = edges [j]; addpolygon (tri); }
Big Thanks to Phil Carpenter who contributed this tutorial for us. Phil Carpenter has designed custom software solutions for the computer graphics industry for the past 20 years. You can contact him by email at phil@phil-carpenter.com


