Review: Cinema 4D R14

On the money: the sculpting tools may have dominated the headlines, but it’s Cinema 4D R14’s other features – particularly the new camera tools – that make it Maxon’s best-thought-out release to date, says Rob Redman.
Cinema 4D has had a strong European user base for many years, but its unique, not-quite-standard way of doing things has prevented it from becoming a big hit elsewhere – at least until four or five years ago.
But recent releases of Maxon’s 3D content-creation software have seen it develop in new directions, with a host of new features, a new interface and vastly improved workflows. The MoGraph module – now part of the Broadcast and Studio editions of the software – earned Cinema 4D its place on many animators’ computers on its own, making short work of complex motion graphics tasks.
Release 14, which came out in September, is as diverse as its predecessors, featuring a raft of updates and additions. But it was the new suite of sculpting tools that really got everybody talking – and with good reason.
Intuitive, non-destructive brush-based sculpting
Restricted to the high-end Studio edition of the software, the tools facilitate ZBrush-style sculpting of a mesh, using familiar tools such as Push/Pull and Smooth to add fine surface detail or create large-scale deformations. Moreover, you can sculpt on any polygon mesh, simply by adding a Sculpting tag to it. This means that you can model as normal, then sculpt in detail and switch it on or off at will, even discarding the tag to leave the mesh unchanged. This non-destructive method of sculpting is very attractive for modellers and makes experimenting easy and painless.
The toolset includes a fully featured layer system, so you can sculpt different details on separate layers and adjust the weight of each on the fly. Fans of symmetry will be happy as all axes are catered for, as well as a radial symmetry option for quickly patterning models or sculpting octopus-like objects.
But now that the dust has settled, I’d suggest that other features of Cinema 4D R14 are actually more useful – or at least, will be used more often by most users.

The new Camera Calibrator tag makes it a simple task to add 3D objects to live plates. It’s not as headline-grabbing as the sculpting tools, but generalists will probably find themselves using it more often in daily work.
In particular, the new Camera Calibrator tag is a real winner, and one that would justify the cost of the upgrade for many users. At its most basic level, it simply creates a camera and a material tag (with materials) so you can match your scene to a photo. In use, you apply it to a camera, load a background plate and then plot a few lines along straight edges in the plate to define the X, Y and Z axes, followed by a pin to anchor the camera’s position. Cinema 4D then solves the scene and creates a material that you can project onto simple objects, turning the photo into a 3D scene that you can move around.
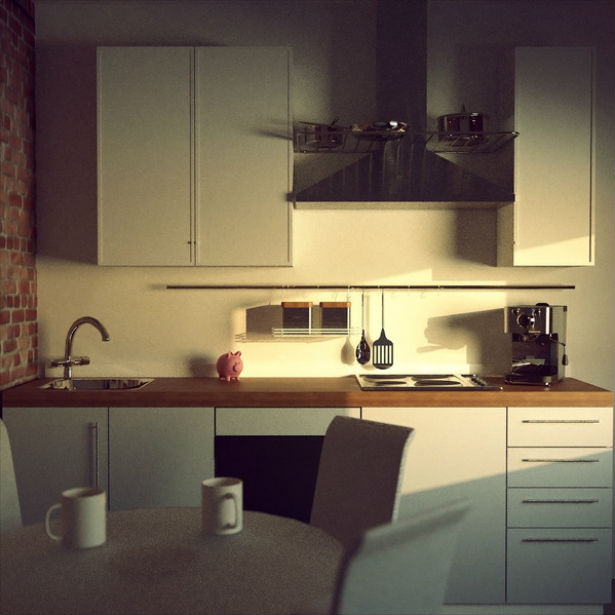
The value of this becomes apparent when you come to add objects to the scene. Positioning an arch viz model into a location photo takes just minutes and the results look fantastic. Light the scene with a panorama – or better still, an HDRI shot on site – and, with very little effort, you have a photorealistic set ready to go. Again, you will need one of the higher-end editions of the software to use it: in this case, Visualize or Studio.
Other new camera tools
The Camera Morph tag is also very useful, particularly for users who are less confident with camera animation, or who need fast results. When applied, a simple slider enables you to animate a new camera move between the cameras already set up in the scene. There is a choice of tweening options, and Cinema 4D automatically adjusts for differences in focal length, depth of field, and so on.
Motion Camera is another useful new tag, this time for documentary-style work. It effectively turns your camera into a Steadicam, down to a stick-figure operator in your viewport that helps you work with scale. Controls are provided to adjust bounce and sway, as well as the kind of motion you would like when turning corners. It’s part of most editions of Cinema 4D R14, bar the entry-level Prime.
Cameras in Cinema 4D now also have a composition tab in their attributes, from which you can control various guides and helpers: for example, title/action safe, golden rule or rule of thirds overlays. Some of these tools were previously available as plugins or presets, but it is great to see them added to the core application.

New snapping methods and guide objects are a real boon for modellers who need precision and speed.
Modelling and the associated workflows have also received a major overhaul in R14, with a range of changes and improvements aimed at making modelling faster and more precise than ever. The most notable of these is the snapping system, which now offers proper interactive work planes that can be snapped to other parts of a model, making it easy to model at an angle, rather than having to try to match things up manually. There are all manner of positioning options, each of which can be accessed via keyboard shortcuts or icons, the GUI having been reworked to keep things streamlined.
Selection helpers have also been added, with objects under the cursor given a highlight overlay, changing to a boundary marker once they are selected. Not everyone likes these features, but they are adjustable, so if you work on a larger monitor or prefer a smaller highlight you can change (or disable) them.

The best feature ever: hitting [Shift]+[C] gives you direct access to any tool in the software. Just start typing.
Another major improvement to the daily workflow that has often been glossed over is the option to click [Shift]+[C] to bring up the Commander dialog. Start typing in the name of the command you want to use, and you have direct access to it. Not only does this minimise the need to rummage through menus for those tools you only use once in a blue moon, it enables you to work in a maximised viewport as much as possible.

In other news: R14 has some great post-processing features, as well as render time aberration and vignetting.
There are many more changes in Cinema 4D R14, almost all of them suitably implemented – and, most importantly, useful to the majority of users. Maxon still has room to improve: many people, especially those in the motion graphics community, have been vocal in requesting better text tools, for example. The MoGraph module went some way towards this, but key tools, such as kerning, have been left out. The symmetry tools have also attracted negative feedback, and a little love and attention here would go a long way.
But overall, R14 is the strongest, best-thought-out version of Cinema 4D to date: it feels like a mature, capable application, but without the bloat that affects some other long-established apps.
Cinema 4D R14 is available now for Windows XP and above or Mac OS X 10.6.8+. Prices range from $995 for the Prime edition of the software to $3,695 for the Studio edition.
Read a full list of new features in Cinema 4D R14
View a comparative table of features in the four editions of the software
About the reviewer
Rob Redman is founder of Pariah Studios and the Cinema 4D motion design and VFX training resource motioneers.net. A 3D artist and designer with over a decade’s experience in the industry, he has produced TV and print campaigns for the likes of The Who, Katy Perry and the government of Qatar. He is currently technical editor at 3D World magazine, where he is responsible for bringing readers training and reviews.
You can follow him on Twitter at @pariahrob.
